Invoices
In this video we’ll tell you about how the ManageMart Invoices Management features works.
How to search custom fields
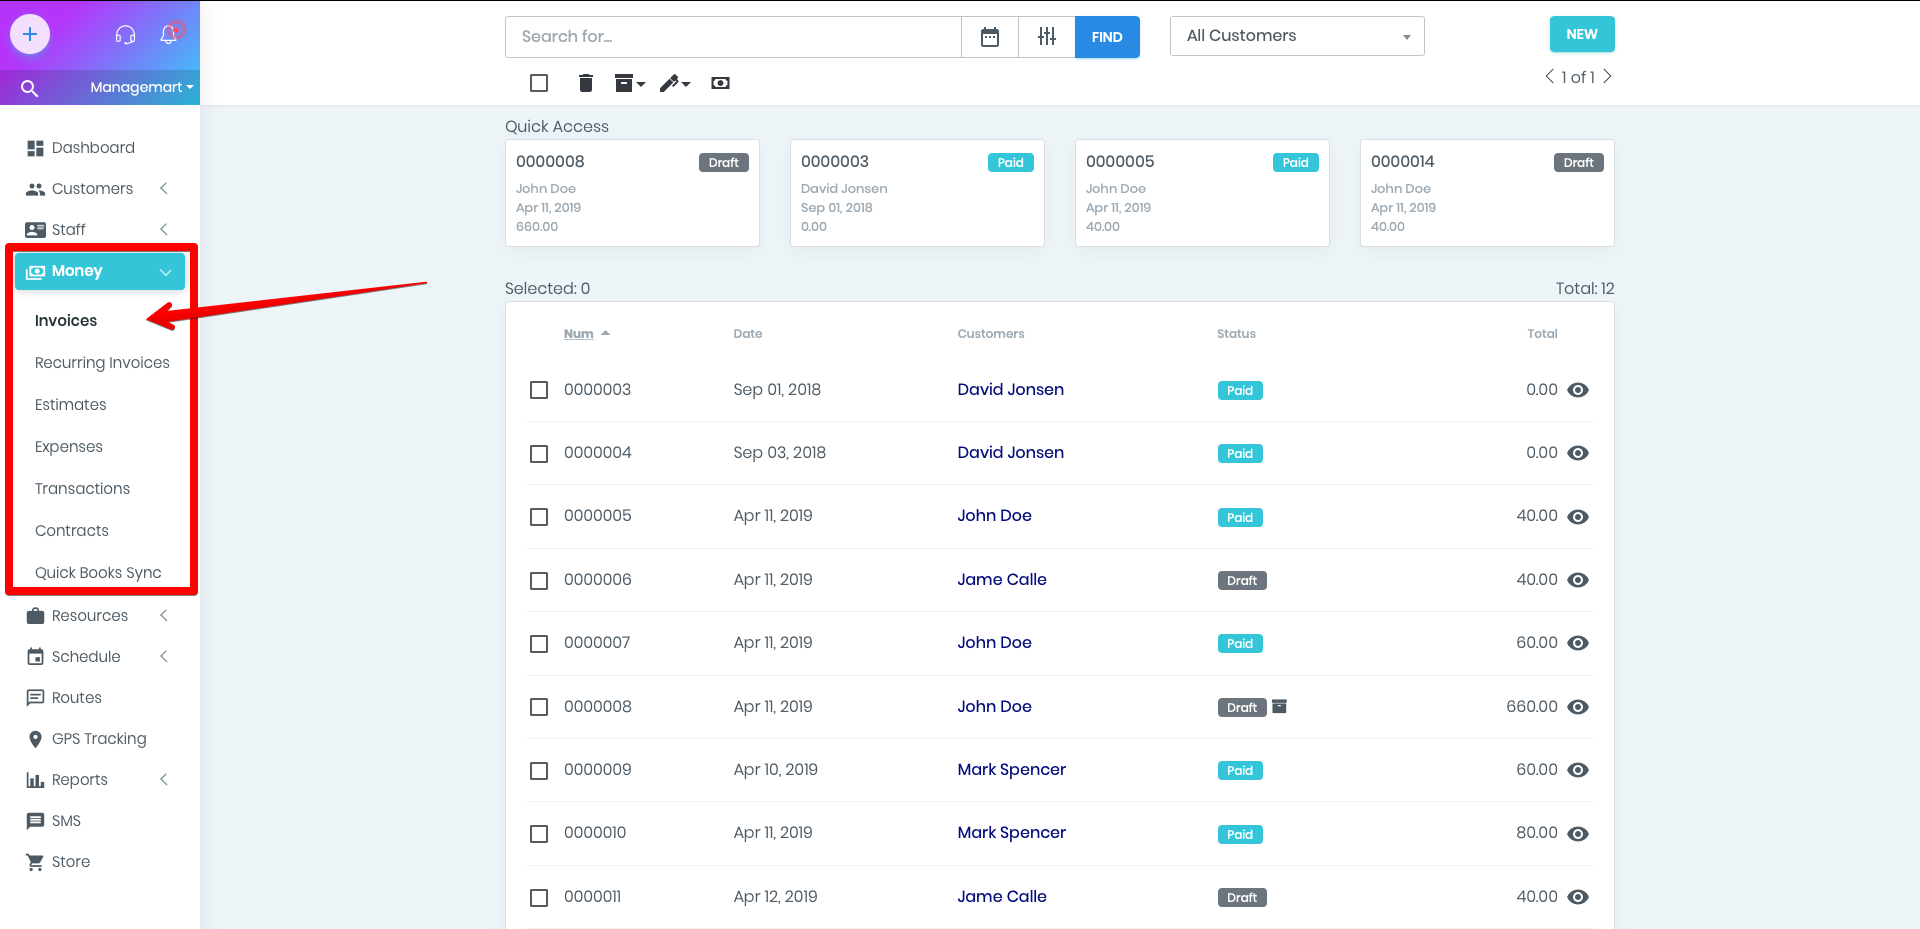
To get to the Invoices page you need to click on the “Money” menu item on left side navigation bar, then click on “Invoices” submenu item.
Additional options provided by ManageMart will help you to find, sort and mark the invoices.
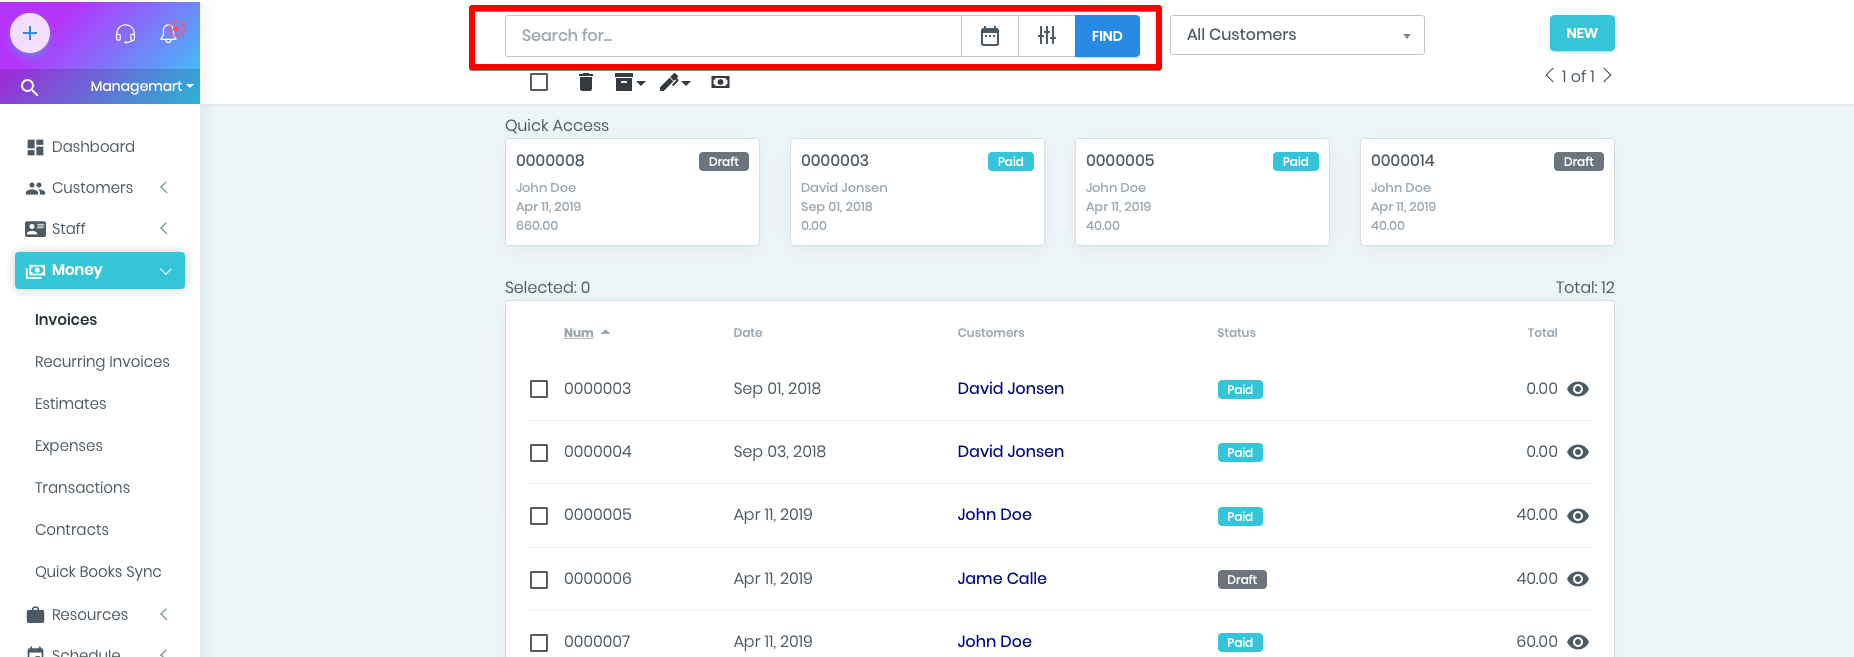
How to search for invoices
In the search bar on the top of the screen, you can find the needed invoice by entering its Invoice # and by the name of the customer. After pressing the button “Find” the searched result will appear.
On the right side from the search bar you can see the icon “Calendar”. By clicking on it, you can submit the date or date range and after the click on button Apply, all the invoices for the following date range will appear.
How to Filter invoices
Next to the Calendar icon you can find the filter icon. Thank to this option you can filter the required invoice by its type and status.
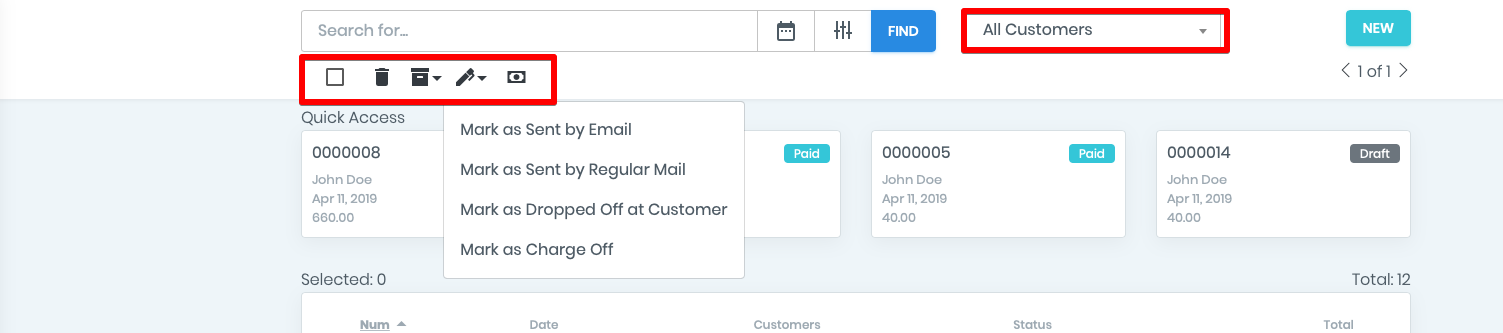
- The field "All customers" is a filter menu related to a particular customer. Select a name from the drop-down list, and you can view all invoices for this customer.
There are four small buttons under the search bar, which have the following actions :
- By clicking on icon “Basket” - you can delete one or several invoices.
- By clicking on the icon next to Basket - you can mark invoices as archive or archived.
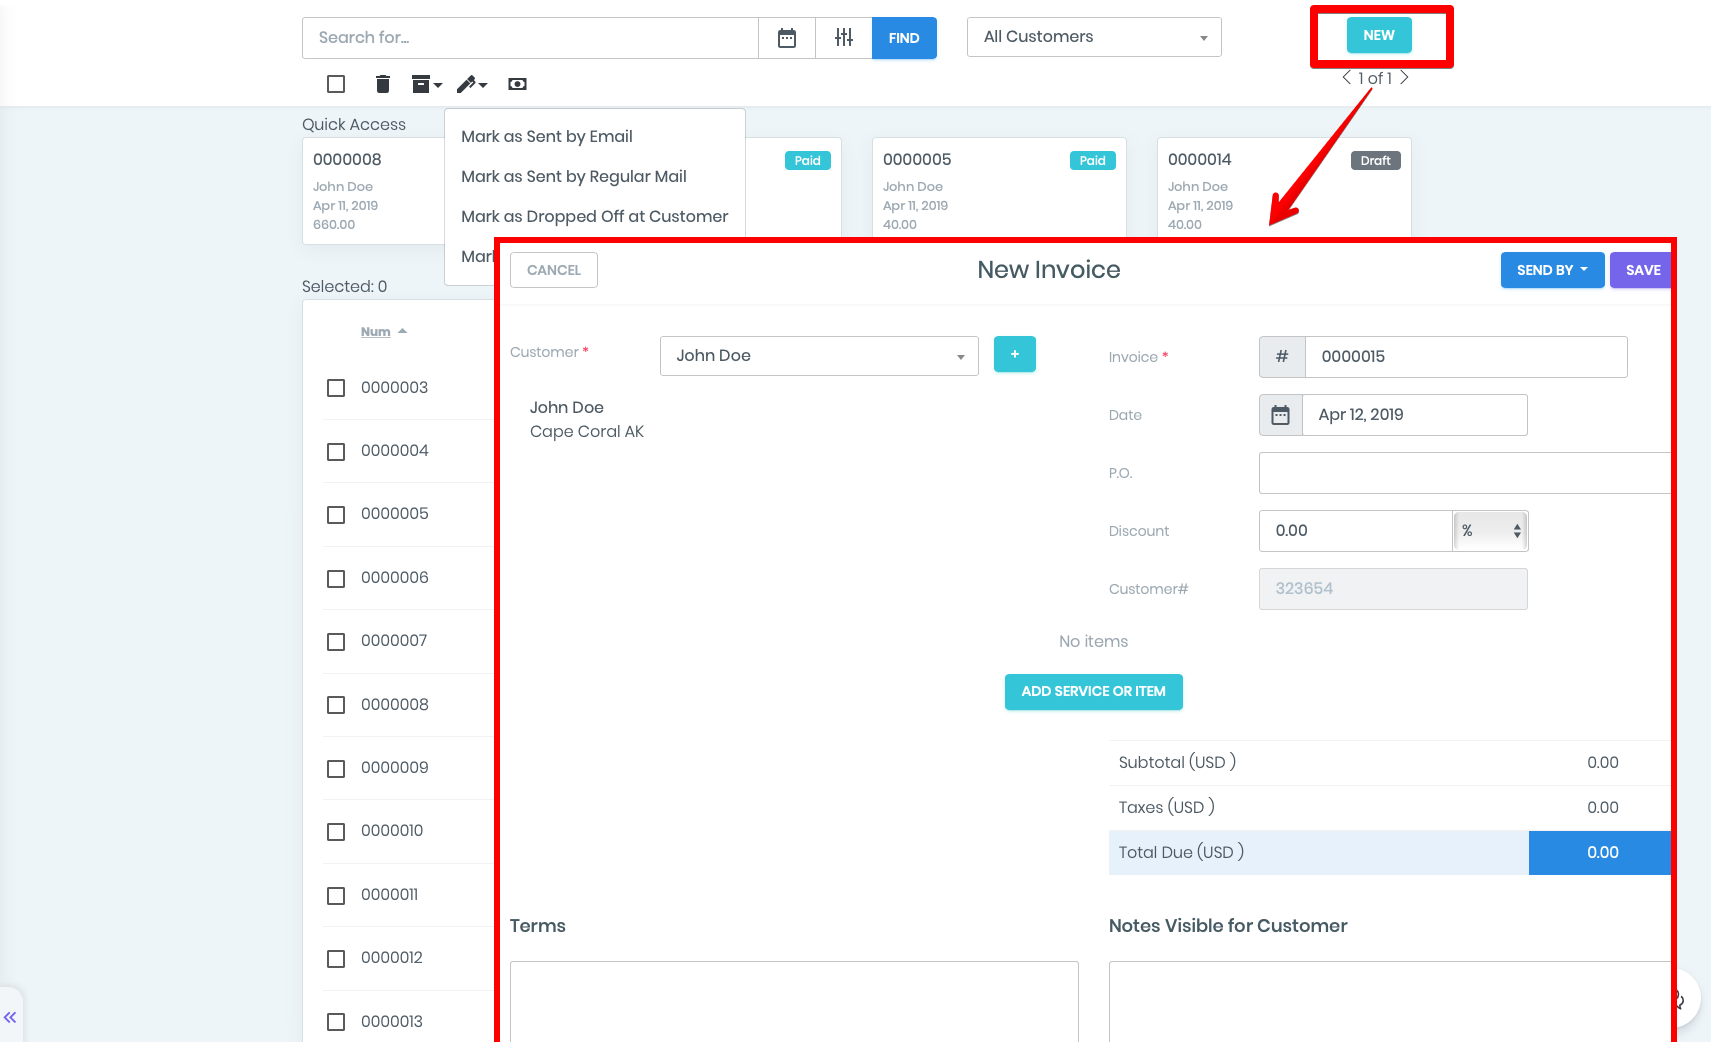
- By clicking on icon “Pen” - you can mark invoices as: Mark as Sent by Email/ Sent by Regular Mail/ Mark as Dropped Off at Customer/ Mark as Charge Off).
- By clicking on the banknote icon, you can Add a payment to the unpaid invoices. In the appeared field you can submit the needed date, select the payment method and add notes to the invoice
- In Quick Access you can view the last 4 opened or edited invoices profiles. This option greatly simplifies and shortens the time for searching for invoices in the list.
How to create new invoice?
- To create new invoice click on the green button “ New” in the right top corner of the page.
- Select the customer in the appropriate field. If it is a new customer, you can create a new profile by clicking on “+,” fill it and then press Add.
- Invoice # - is the serial number of the invoice. Optionally, you can manually change it.
- The Date field is used to specify the desired date of the invoice.
- P.O. means Purchase Order and isn’t necessary to specify.
- Discount. This field is designed to provide discounts for customer (if needed) and will be automatically filled with a discount if it is set in the profile of the selected customer.
- The Customer# number is assigned automatically, and you cannot change it.
- Then we proceed to the creation of items or services in the invoice:
- Select the date - Enter the product or service - their Description - specify the Cost - Quantity - Tax. Assign an Asset if required. The button “Add Service or Item” creates additional invoice positions. Whenever you fill in an invoice or when you add a service or product on the users, assets, tasks, etc. page, after saving, the services or products entered in these fields will be available on the inventory management page. That means that all new services or products you add are automatically created and saved in the database.The amount of the invoice will be calculated automatically.
- Under the invoice amount, there are "Terms" and "Notes Visible For Customer" fields. Here you can manually enter the necessary information. These fields will be automatically filled with data in the following order:
- If the Terms and Notes are set in the client profile, the fields will primarily be filled with these records.
- If the client's Terms and Notes are not fixed, but they were entered in the general settings of Invoices and Estimates in your account, then this information will appear in the fields.
- If there are no Terms and Notes in any of the above sections, then these fields in the invoice will remain empty.
- You can also add an attachment by clicking on “Select file” or Drag-and-Drop it. It can be any file type - both images and documents.
Note: How to create a recurring invoice you can watch in our separate video - “Recurring invoices”.
How to edit the invoice?
To edit the invoice, please press in the icon “eye” in the list with the invoices.
- In the appeared window press the button ACTION on the right top corner and choose EDIT.
- In the appeared form edit all the required information.
- To save all the data please press the button “Save”.
- Please note, that paid invoices cannot be edited.
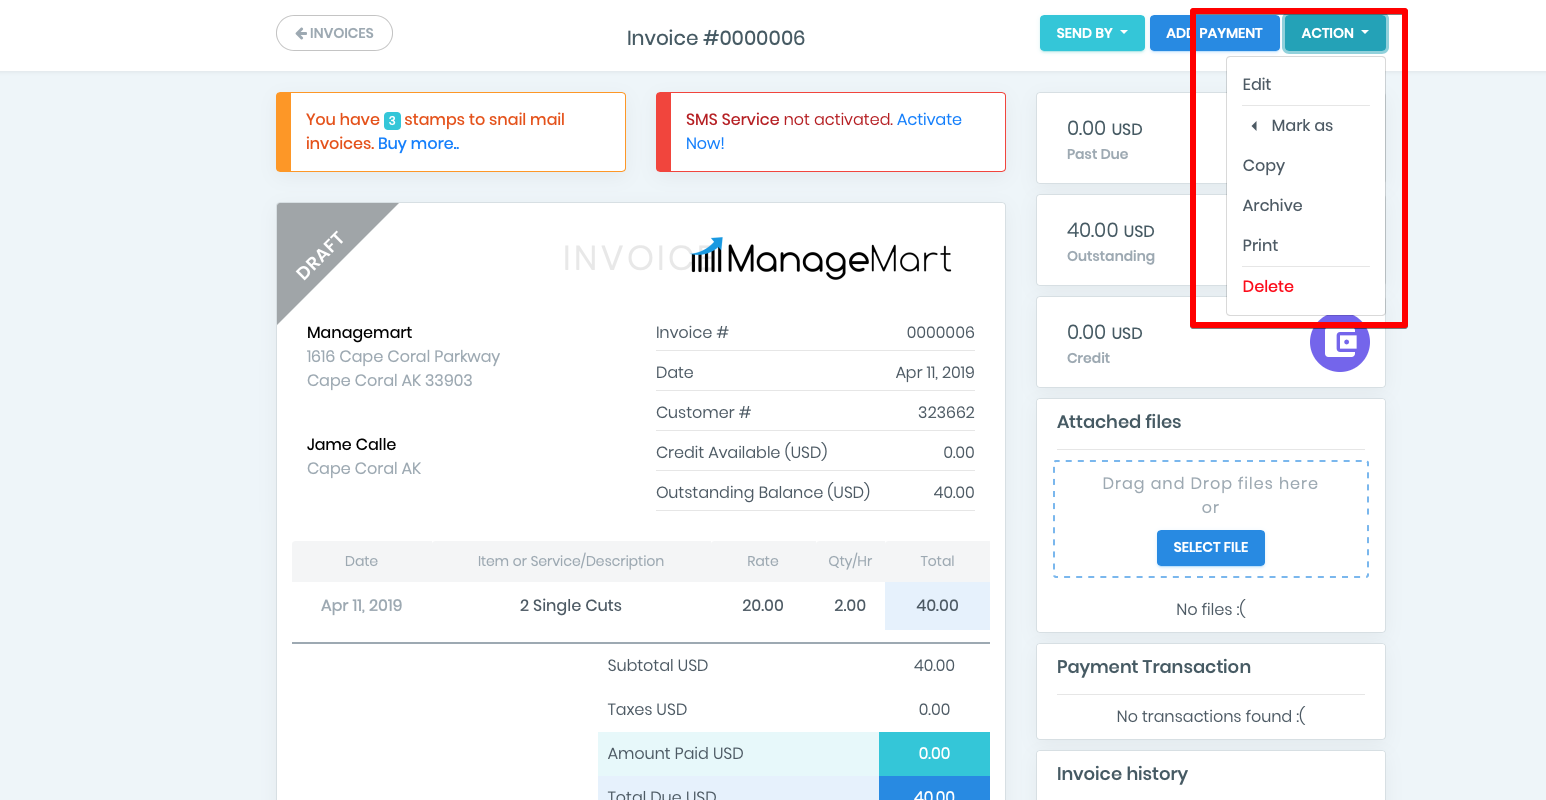
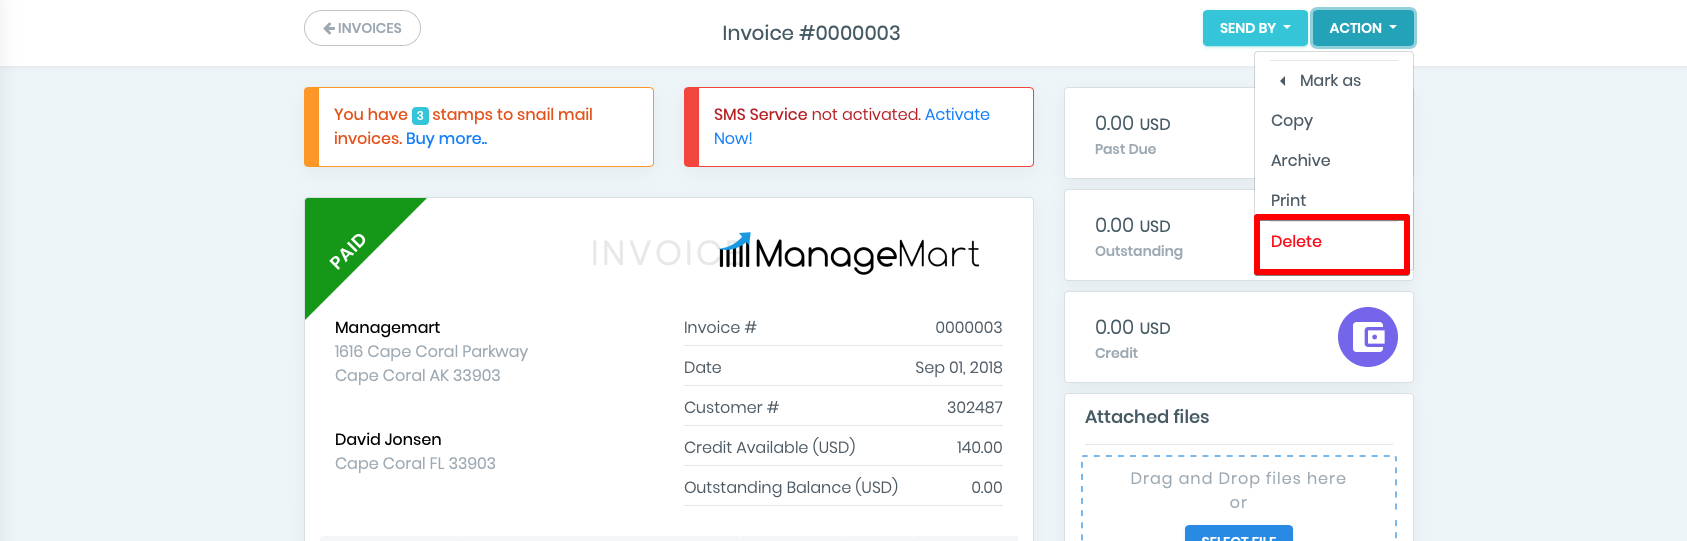
How to delete an invoice?
You can delete the invoice both from the general list and in the invoice record itself
- Open the needed invoice from the general list. In the appeared window press Action button and choose “Delete”.
- You can delete one or several invoices by putting a tick on the needed record and then click on the “basket” icon.