Customer Management / Part 1
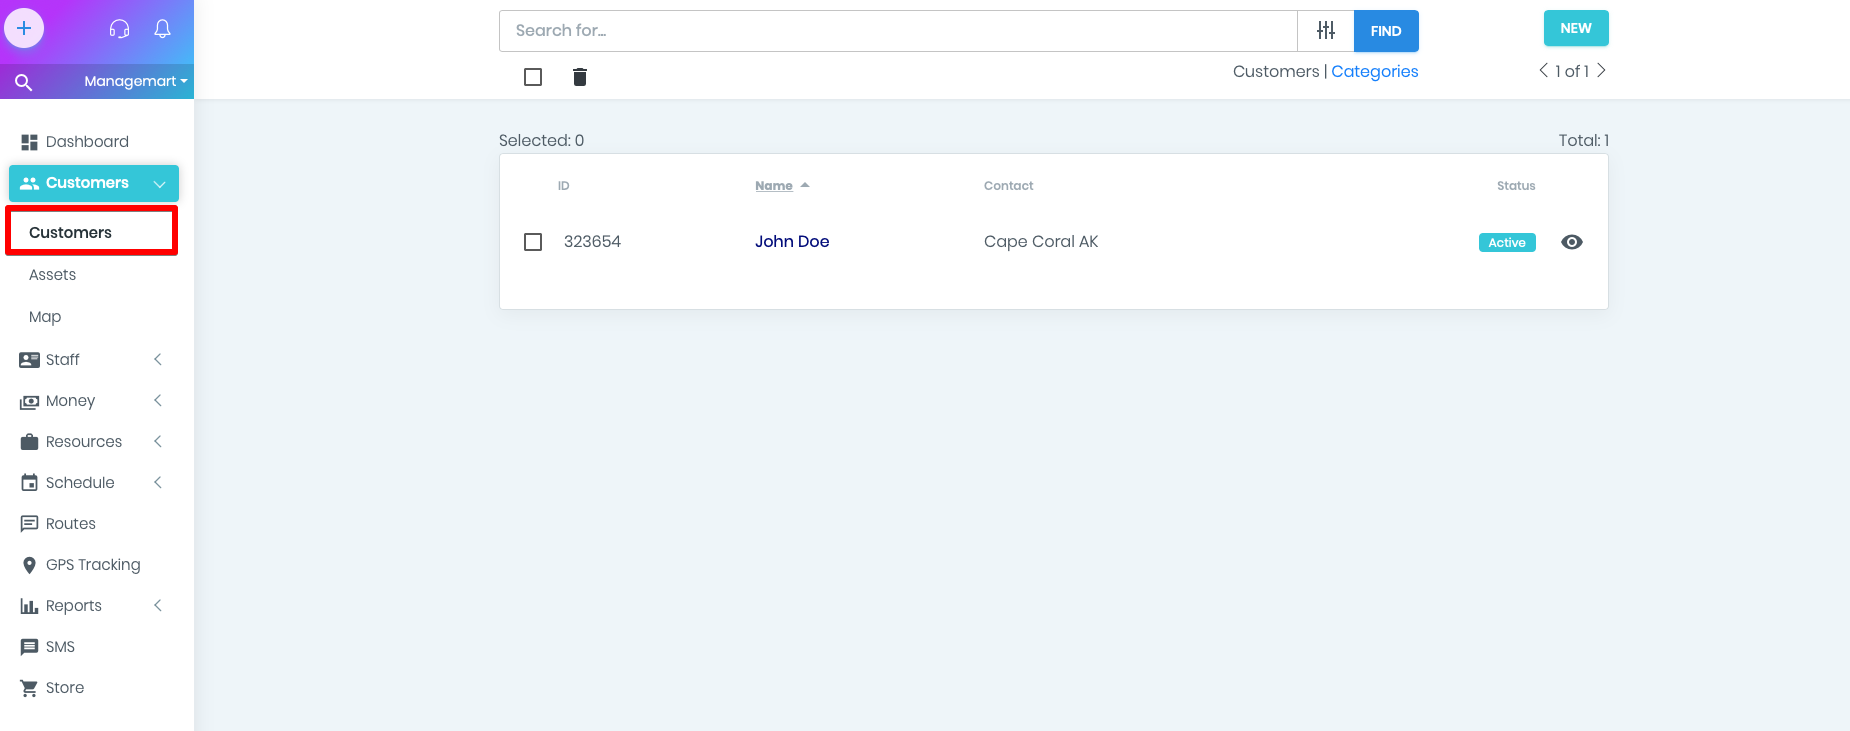
Customers page is a section where you can manage your customers. It provides all the necessary information about your customers, which you can edit or supplement.
- To get to the customer's page, click on Customers item on the left side navigation bar and then on the sub-item “Customers”.
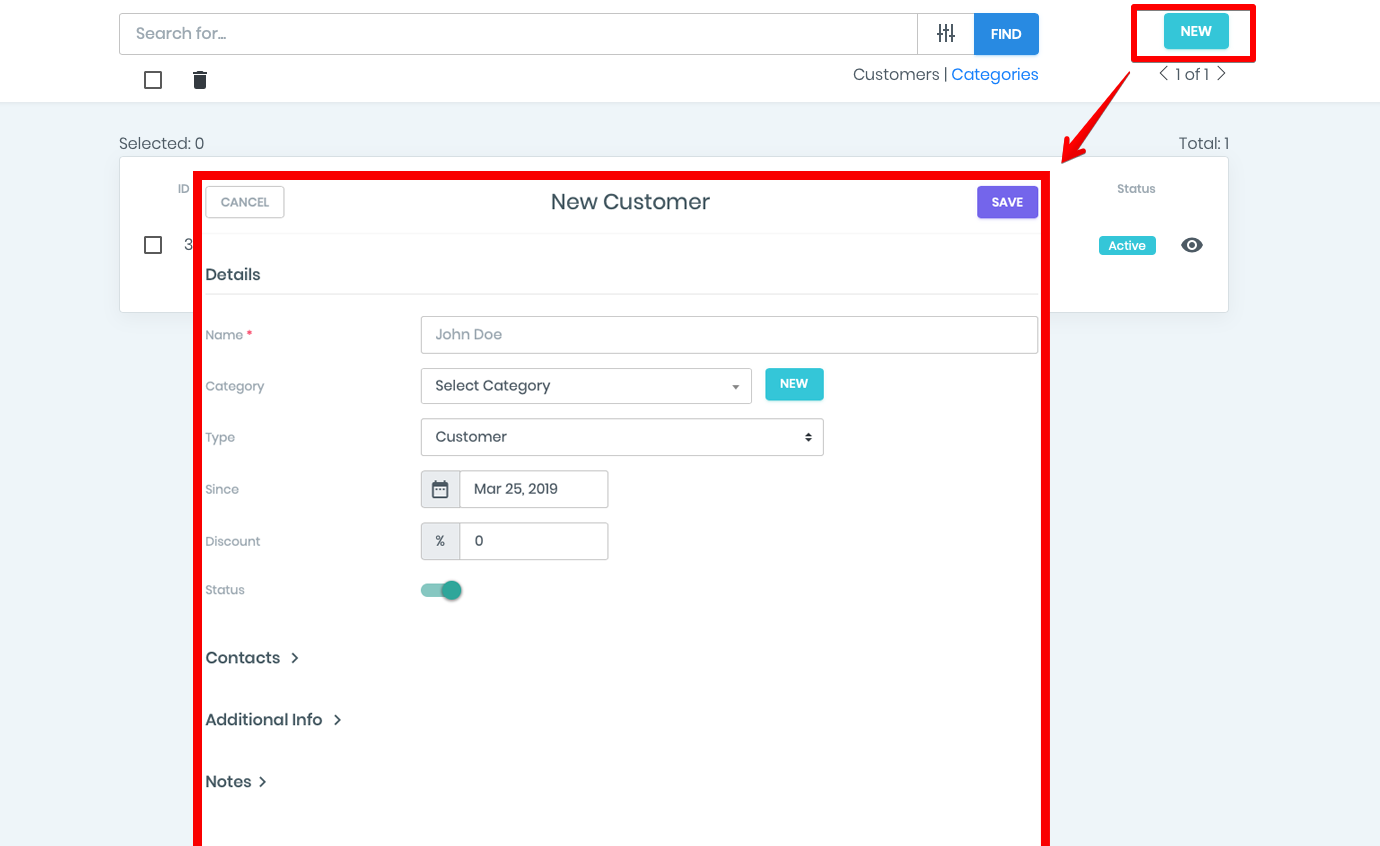
Add Customer
There are two ways to add a customer record:
1. Add a customer manually
2. Import customers
- To add a customer, click on the green NEW button in the upper right corner.
In the appeared window, please enter the following information:
- Name - first and last name
- Category - you can add to define any category for the customer, for example - individuals or companies. Categories are useful when filtering a list of customers and when getting reports.
- Type - the type of customer can take several values: Customer, Potential, Competitor, Supplier or Partner.
- Since - this is the date when you have started working with your customer.
- Discount - a discount that is set in percentage and that you can determine for your customer and which will be applied in all invoices issued to your customer.
- Status - customer status can be active or inactive. If you change the state to inactive, you can add a note with the reason why it is inactive.
- Contact section - In the contacts section, you can enter customer information, which includes email, country, state, city and address, zip, phone number.
- There is no need for additional information. You can either enter the field from the created area. (Watch the video about custom fields).
- Notes section - here you can add any notes about the customer.
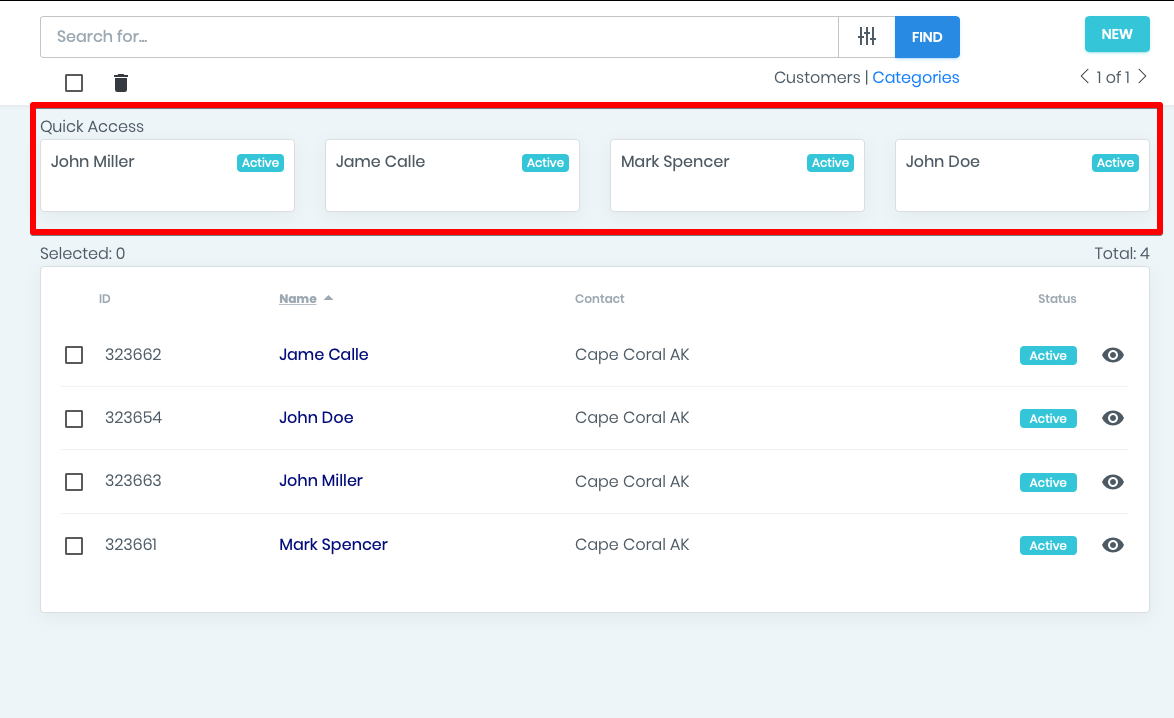
Quick access
- After adding a new customer and saving the information, this newly added customer will appear in the general list of customers and in QUICK ACCESS.
- In quick access you can view the last opened or edited customers profiles. This option greatly simplifies and shortens the time for searching for clients in the list.
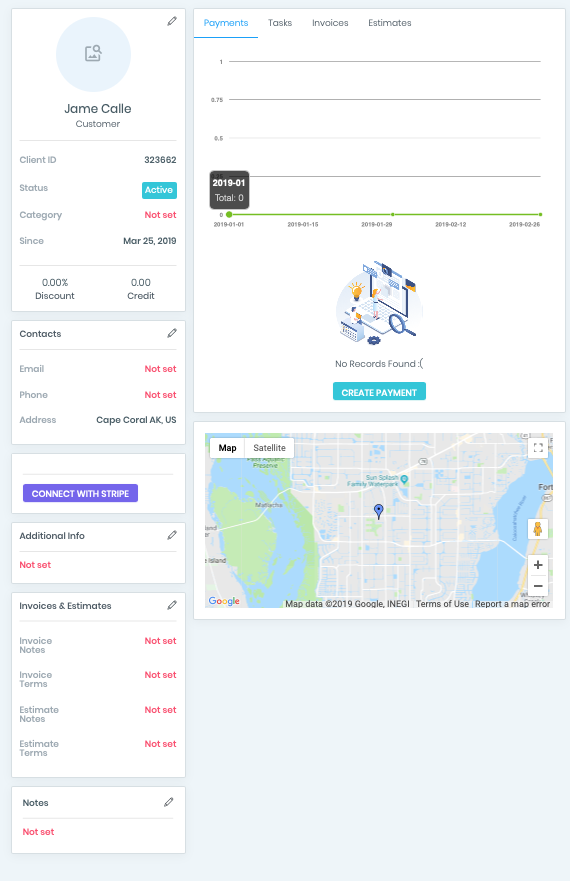
Customer profile
The customer profile contains all the detailed and necessary information about the customer.
To view and change customer information, click on the EYE icon - you will see the full profile data. For your convenience, we have grouped all the information into several blocks.
- Basic information - all the main information about the customer including his photo.
- Contacts - contact information, including email, phone, country ,state ,city and address
- Bank Cards — information about the bank cards and payment method
- Additional Info - supplementary data about the customer
- Invoices & Estimates - settings for accounts and estimates related to this customer
- Notes - section for notes
- Payments - a quick report on customer payments and a list of recent payment transactions.
- Tasks - all the tasks related to this customer. Can be - daily and monthly.
- Invoices - accounts associated with this customer. It displays statistical information on the customer’s accounts and the latest list of statements related to the customer.
- Estimates - estimates of the customer - all information on the accounts associated with the customer. In this section, you can set individual Terms & notes for invoices that will be applied to invoices associated with this customer.
- Customer on the map - map on which the geographical location of the customer is displayed. It work, only when entering the full customer address.
How to edit customers profile
- To change customer information, please click on the icon EYE and the window with all the profile information will appear.
- In the profile , you can change the information in the corresponding blocks by clicking on the pencil icon. Once you click on it, a window with a form for editing the relevant information will appear - change and save.
- by clicking on the “Save” button or cancel the changes by clicking on the “Cancel” button.

Adding bank card to the customers profile
The Managemart autocharge customer feature is as feature thanks to which, you can receive payment from a customer automatically after creating an invoice.
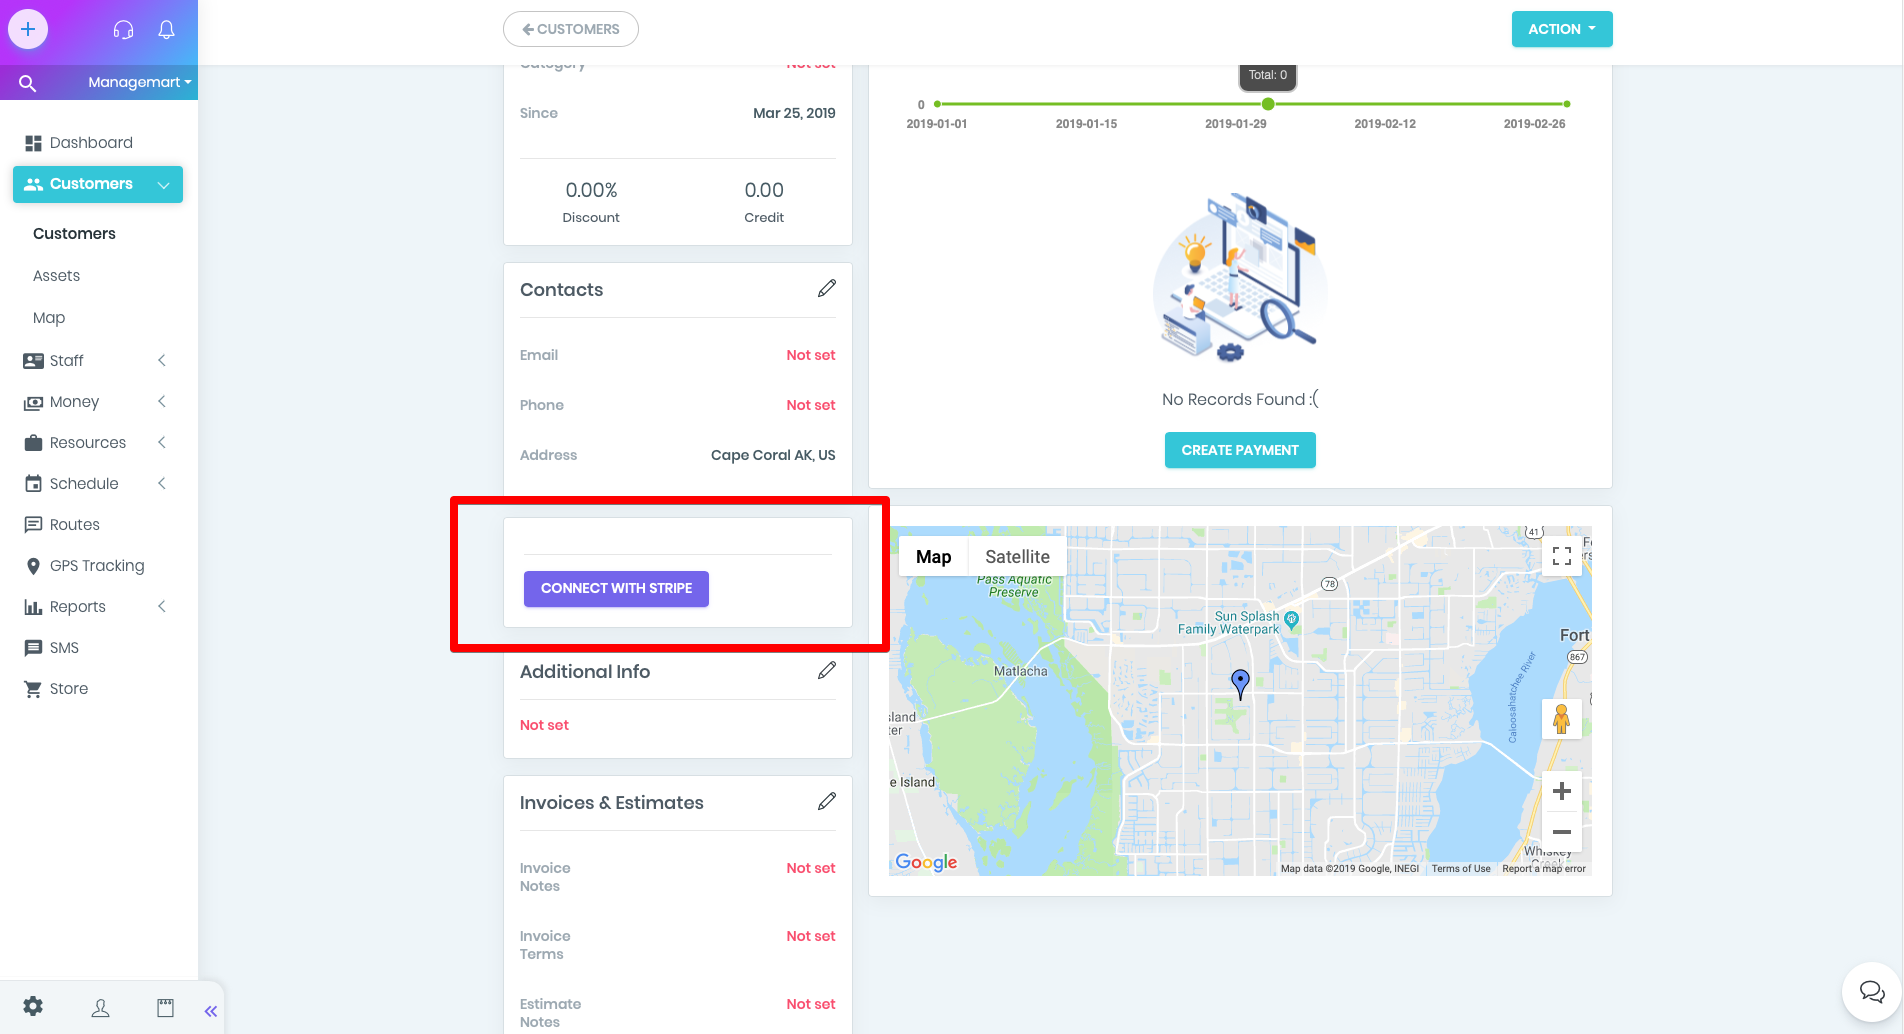
To activate this service, you should connect your Stripe account (or create a new one).
In the separate video will tell you how to connect your accounts to payment system.
- To connect your Stripe account or create new, please press the button “ Connect with Stripe”
By one click you will be forwarded to the website Stripe.com, where you should confirm permission to use your Stripe Account at ManageMart and receive payments from your customers.
- After confirmation of Stripe, you will be transferred to the customer list. On the customers profile you will see the “No record Found” label and the disconnect stripe account button.
To add a customer’s bank card, click on the pencil icon in the `Credit Debit Cards' block. In the appeared window please enter customer’s credit card credentials.
Note:
The customer can also give permission to use his card for automatic payments in the customer area.
Customer area - it's a mini website where the customer can view and pay invoices online, which you have sent to him to email or via SMS. After the permission of the customer to withdraw payments from the specified card, it will appear in the list of cards in the Debit / Credit Card block.
After saving - the card information will be displayed in the list of cards in the DEBIT / Credit Cards section.
Search and Filters
On the page with the list of the customers you can filter customers by various categories.
You can filter customers by the following fields:
- ID, name, status, alphabetically and against the alphabet
For convenient display, it is possible to apply the filter to the list of customers.
The following filters are currently available:
- Customers who have a loan or not
- Active / inactive
- By the type of the customer
To delete the customer put a tick and then click on the “basket” icon.
