Calendar
How to search Calendar
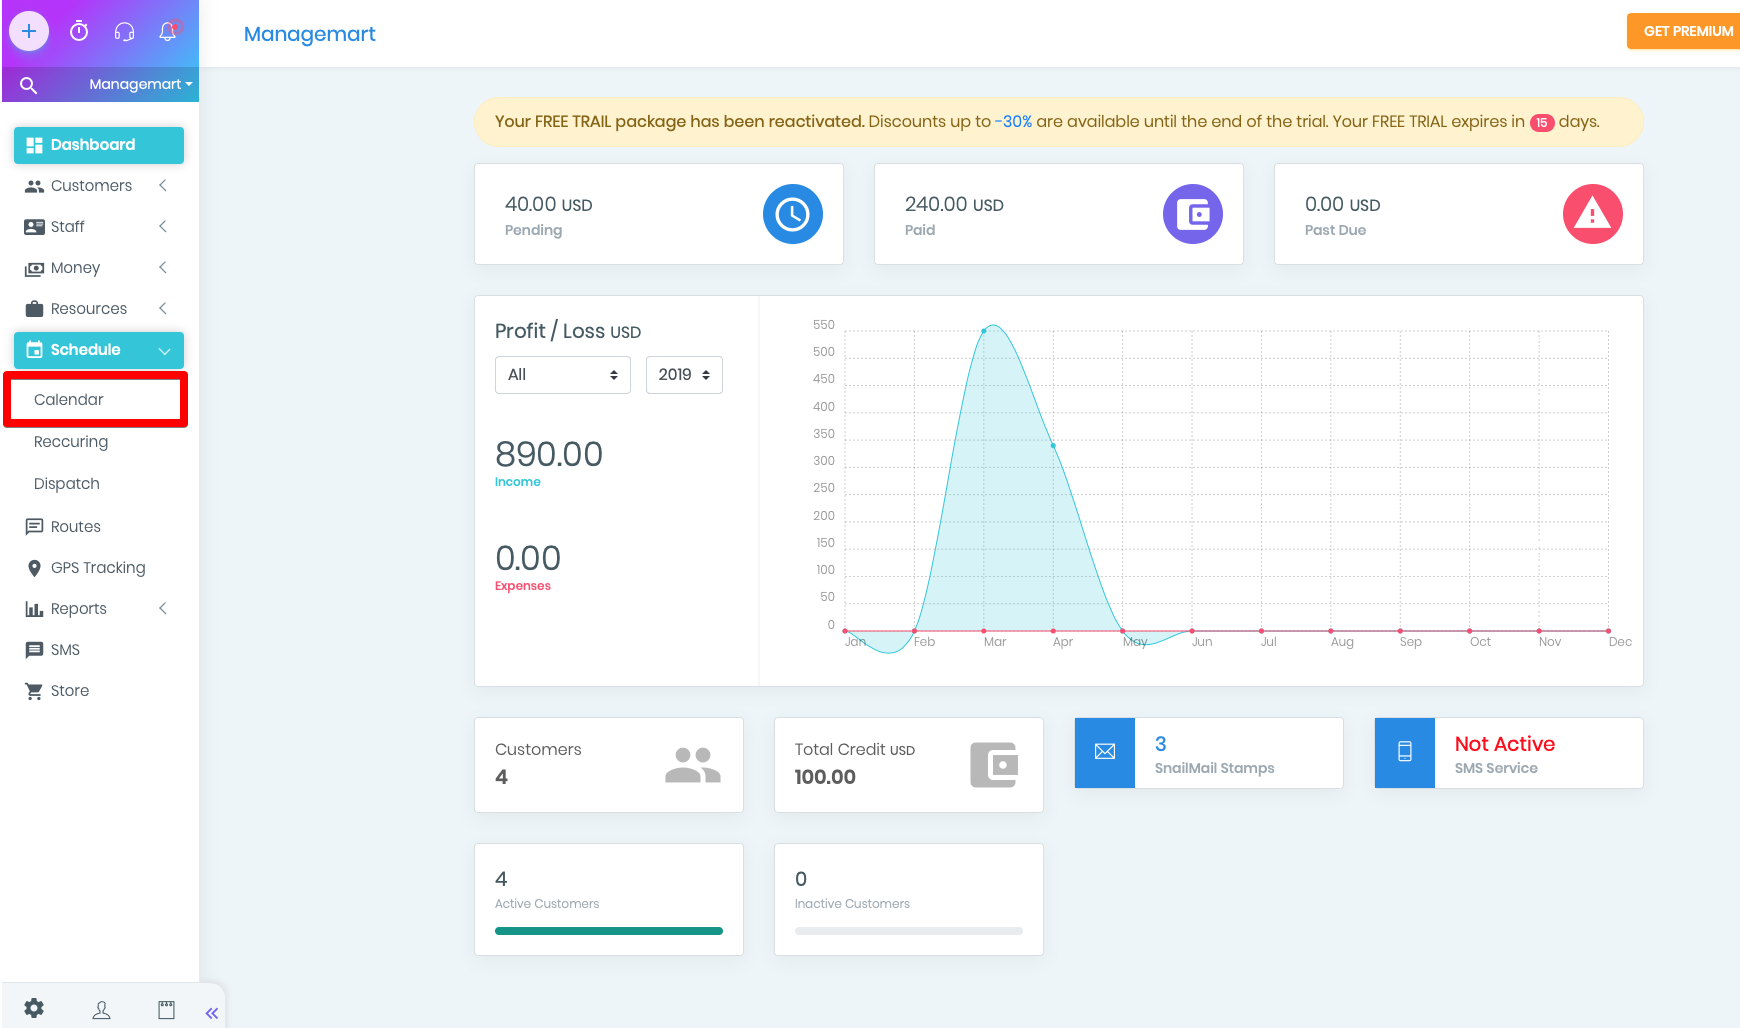
To get to the Calendar page you need to click on the “Schedule” menu item on left side navigation bar, then click on “Calendar” submenu item.
Additional options provided by ManageMart will help you to find, sort and mark tasks on the Calendar page.
Day-type Calendar Page Overview
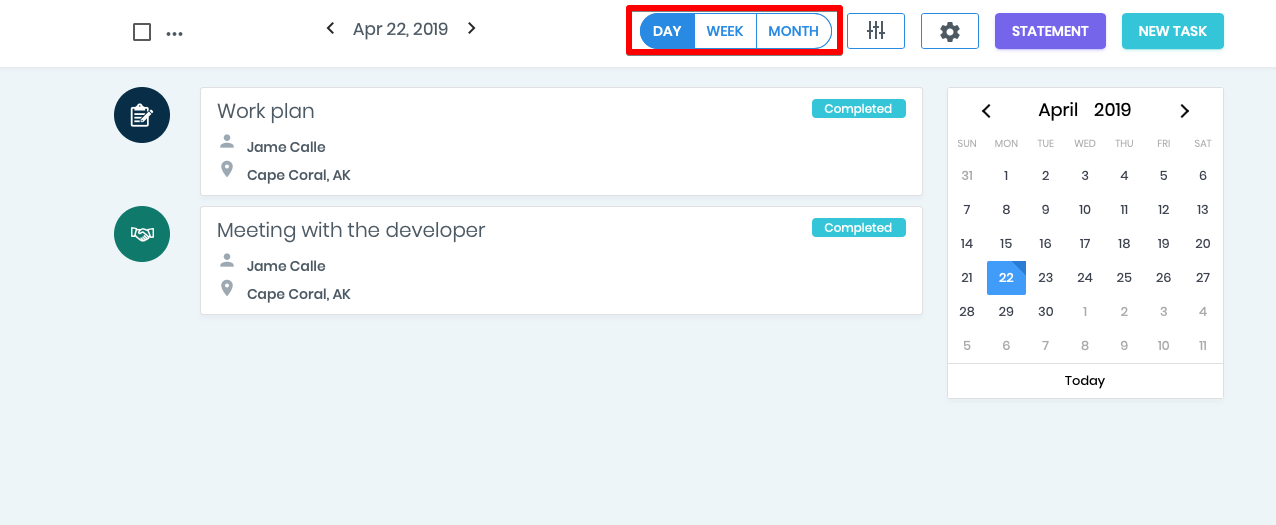
There are three ways on how to view the tasks :
-Daily
-Weekly
-Monthly
By default you always see the Daily view of the calendar, you can set default view in settings page (Calendar Section)
Let’s make a quick review on the Daily view of the ManageMart calendar feature.
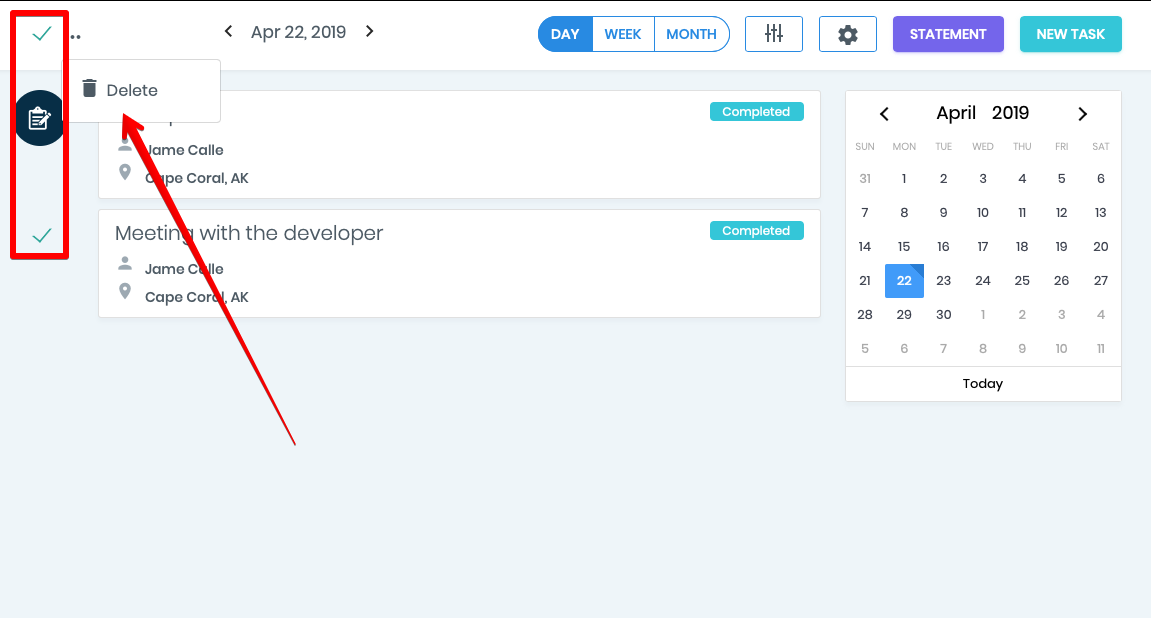
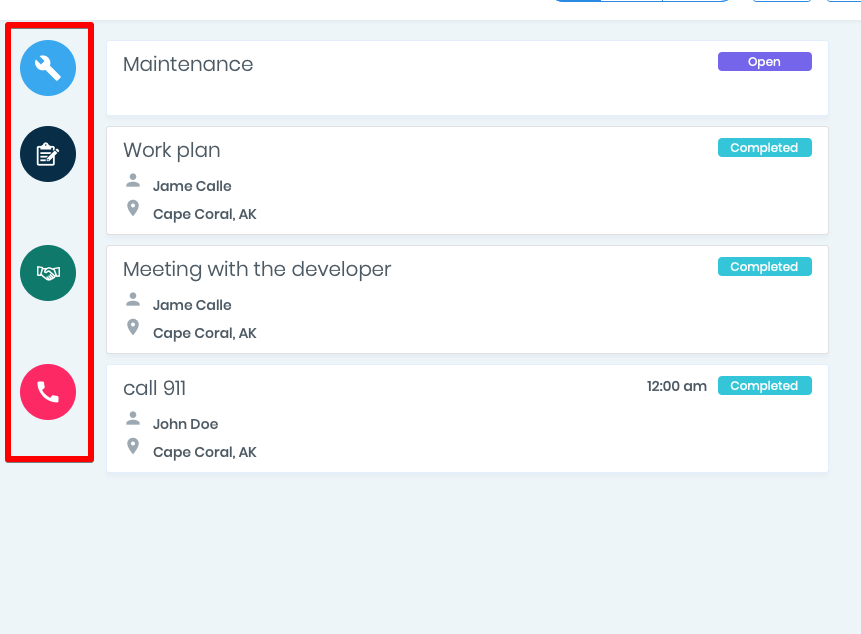
- The empty square icon in the upper left corner is responsible for highlighting tasks from the general list on your profile.
- By clicking on this icon, you can automatically select all the tasks on the page.
- You can also select each task individually by clicking on the task type icon and checking the checkbox there. The second click cancels the selection.
Delete Calendar Task
- The ellipsis next to the selection option hides the Delete Task button.
- On the other side, there are 3 buttons to change the display of tasks - by day, week and month.
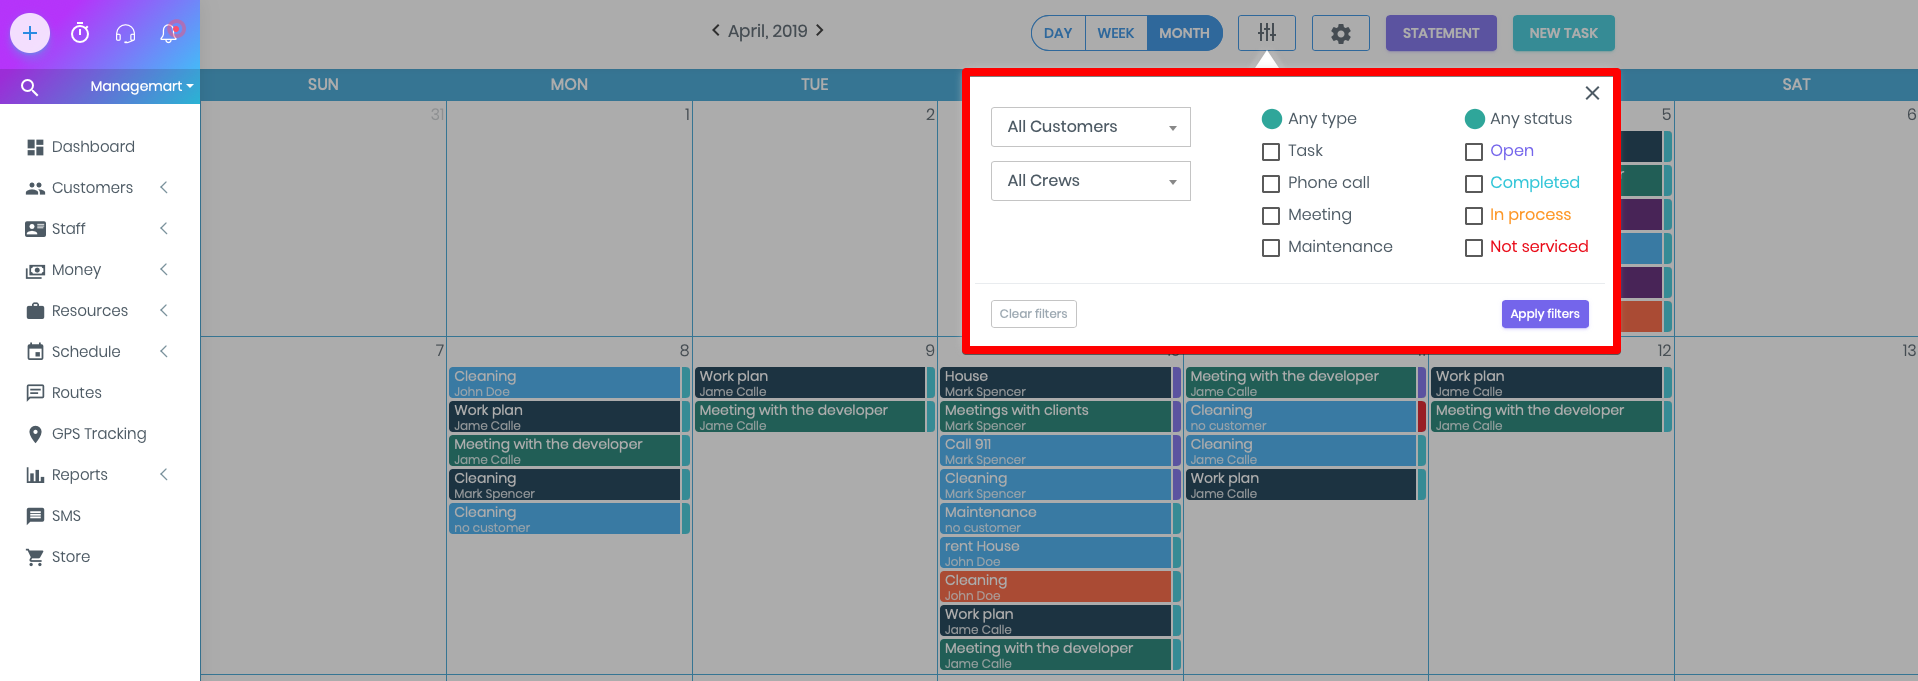
How to filter the tasks
By clicking on the option - filter, you can filter your tasks under following settings:
- From the drop and down list you can pick the option all customers or type the name of the needed customer.
- You can also pick the crew responsible for the task
- By the type of the task
- By the status of the task
After selecting the desired peculiarities just click on the Apply filters button. You can press Cancel - in case of cancellation.
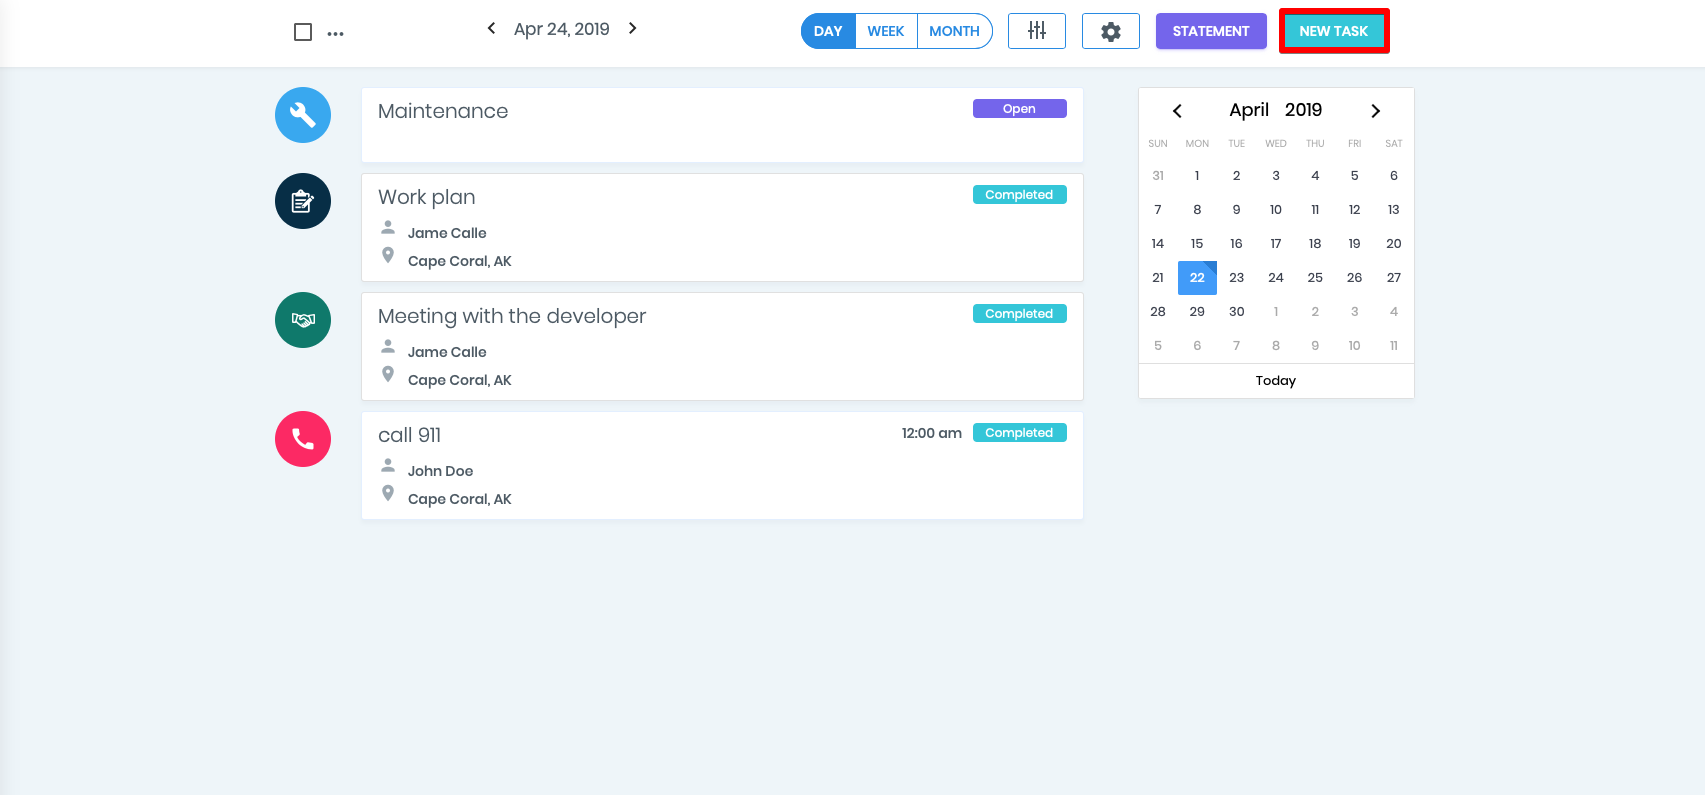
In the Day task view mode, you can move from the current day to any other day by selecting this day in the small calendar on the right side of the tasks.
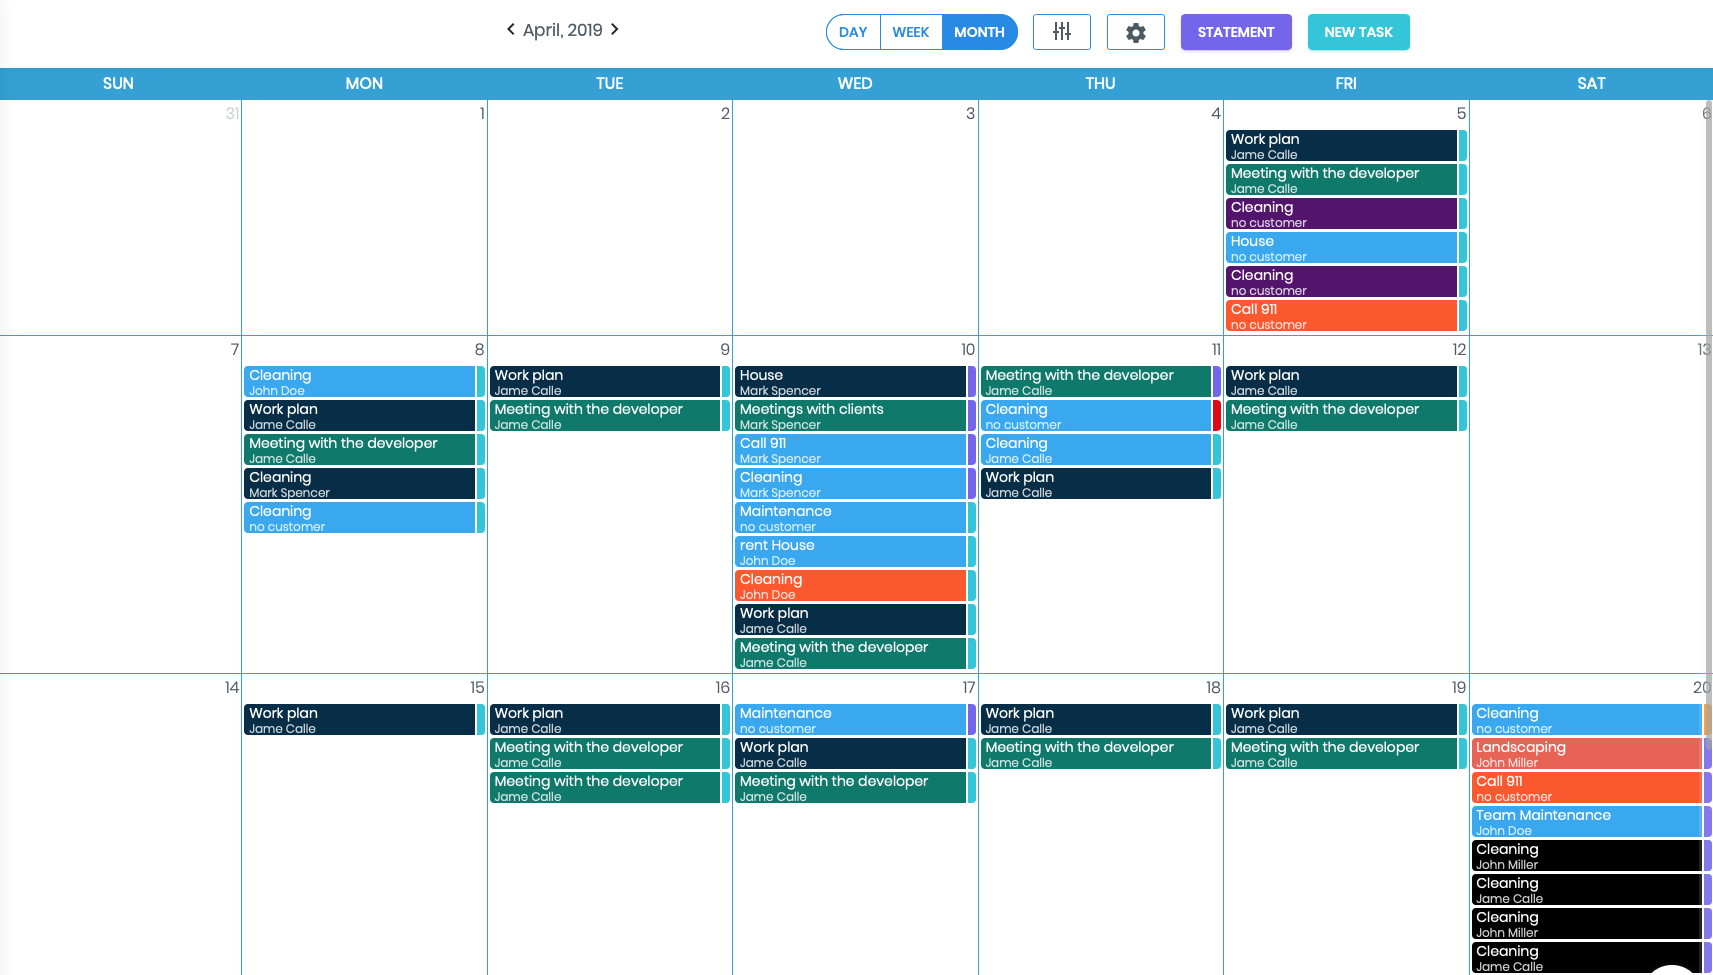
Month-type Calendar View
In the Month-type Calendar, you can change the view of the task. It can be :
- Modern - in the minimalist style
- Classic - this view will contain more details and information about the task.
- The Classic view has two versions - compact and extended.
In the compact version, the view of the list of the tasks will look like this
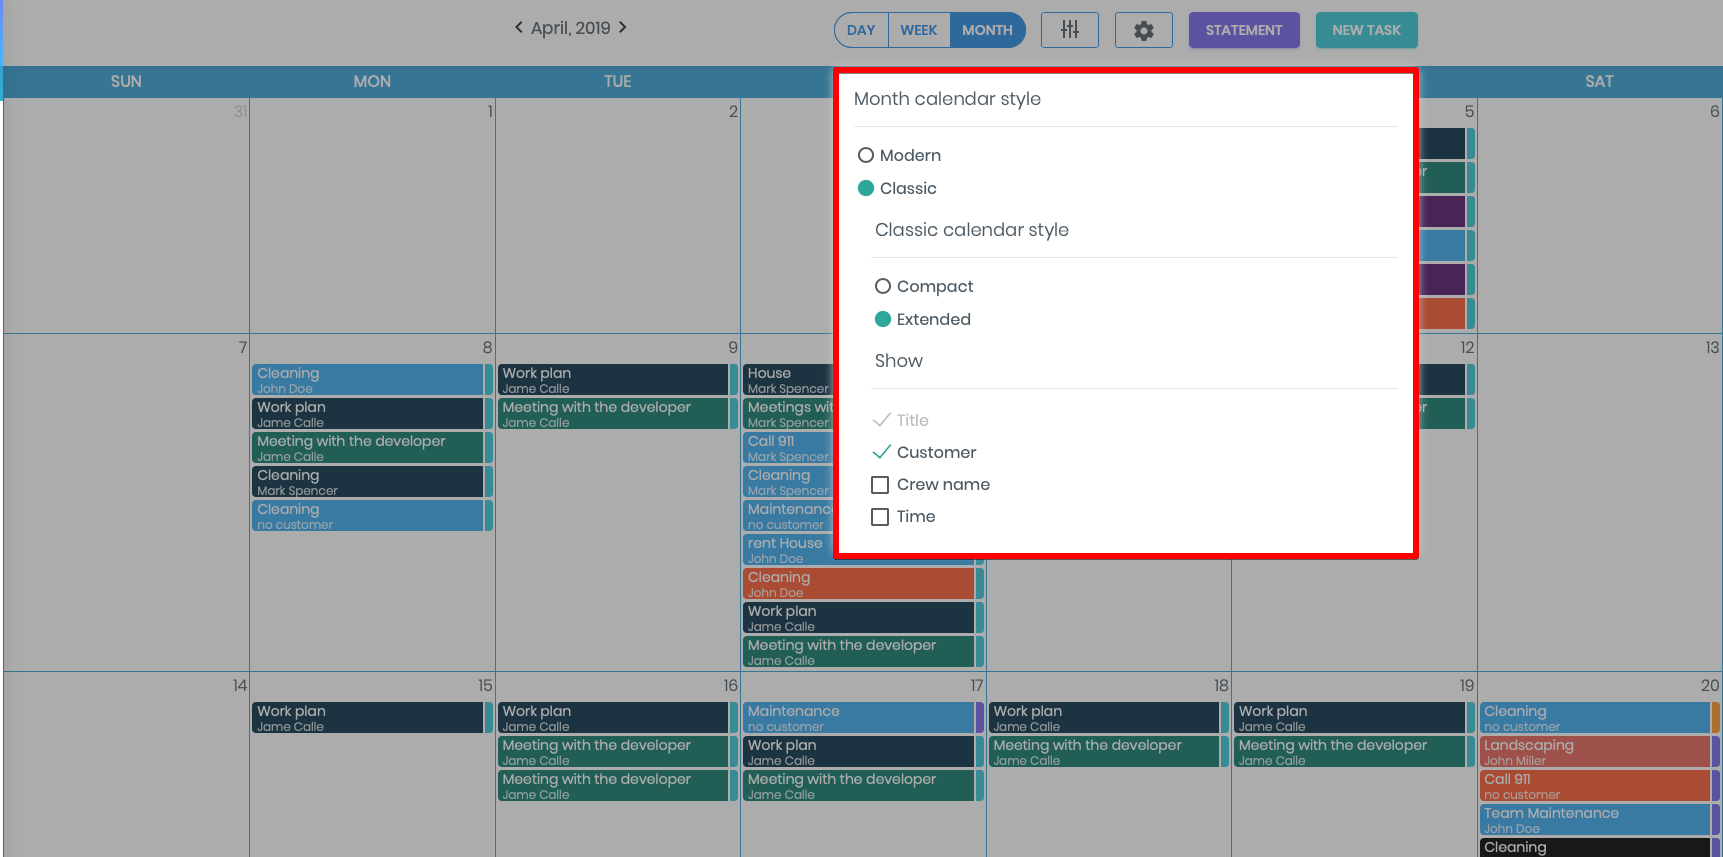
In the classic view settings you can add or remove the information about the tasks.It can be displayed:
- by the name of the task,
- by the name of the customer,
- by the name of the crew or time.
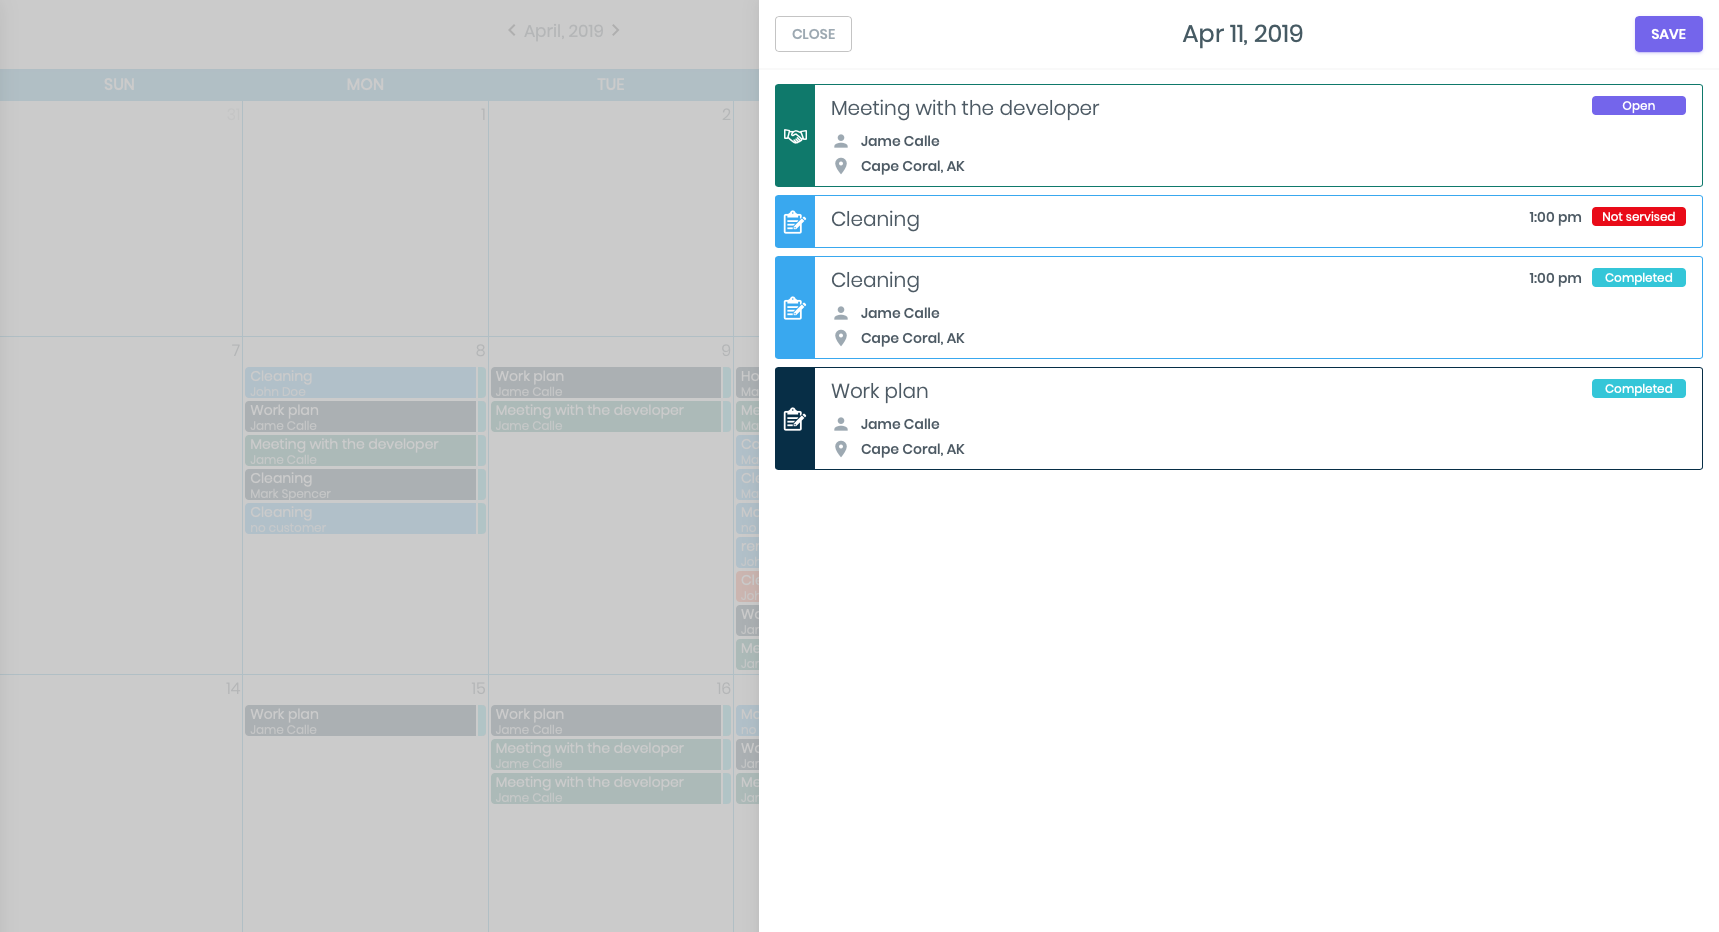
You can see the full list of the tasks by clicking on the needed date in the calendar.
To view all the details about the task, just click on it. You can also edit, delete or change the status of the task into Complete.
About the button - Statement, which means attobit, you can learn in the separate video named - Statement.
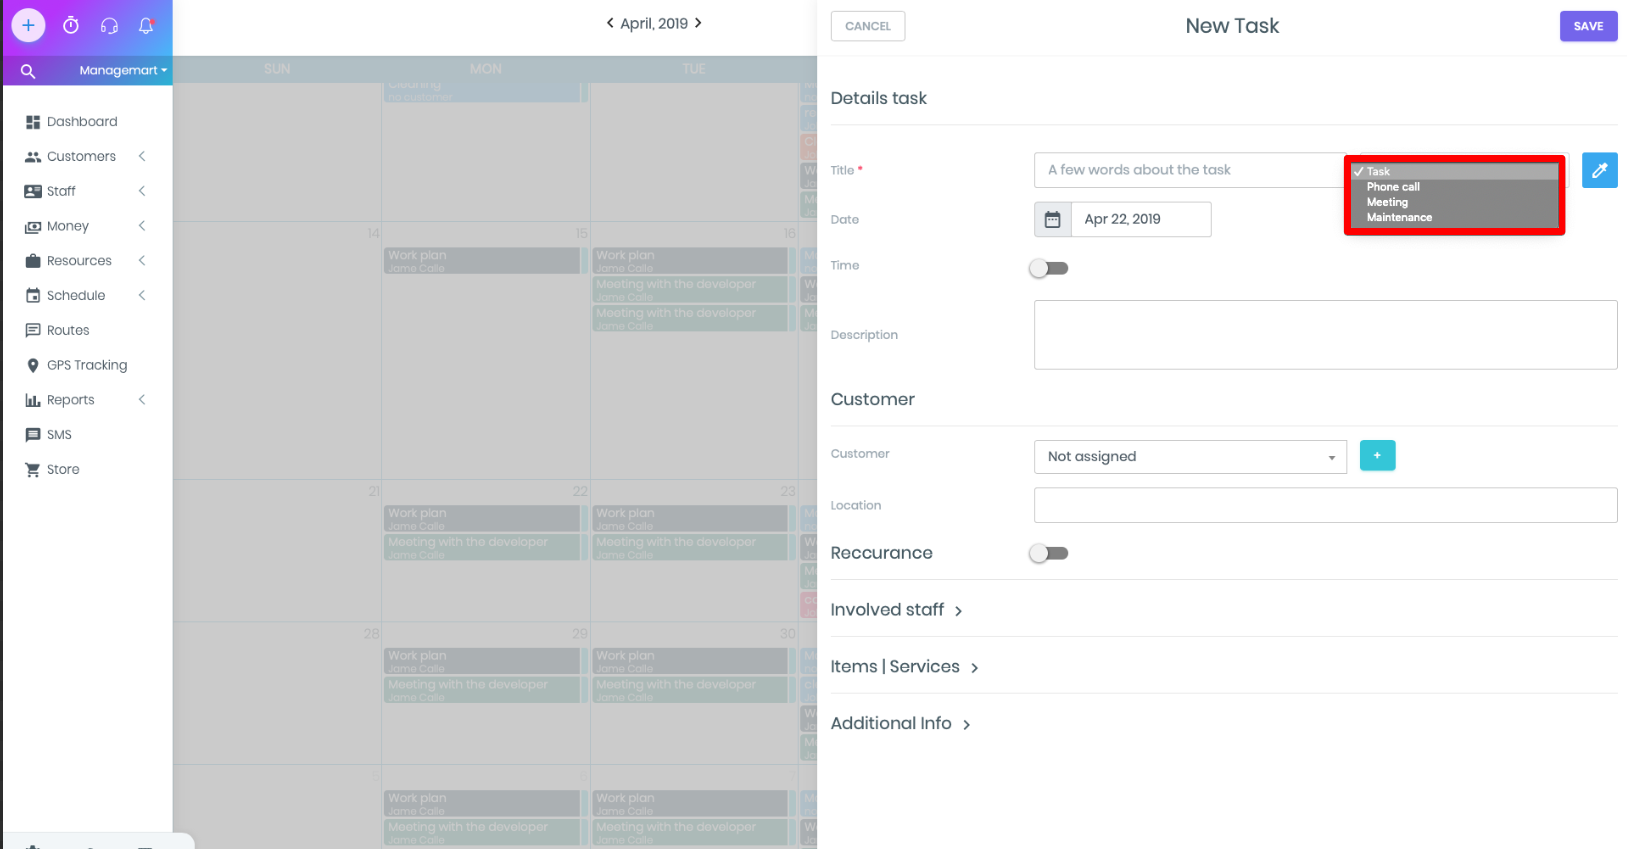
Types of the tasks
There are following types of tasks
- Task - for general tasks
- Phone call - to call to the customer
- Meeting - to plan meetings
- Maintenance - for internal tasks related to the maintenance of machinery and equipment
Note. In Calendar Month mode, you can find out the type of task only after opening the task for viewing or editing.
Statuses of the tasks can be:
- Open - the open task
- Completed - completed task
- In process - task which is in progress
- Not serviced - Failed / unattended task; you can see the reason for the following status in the appropriate field
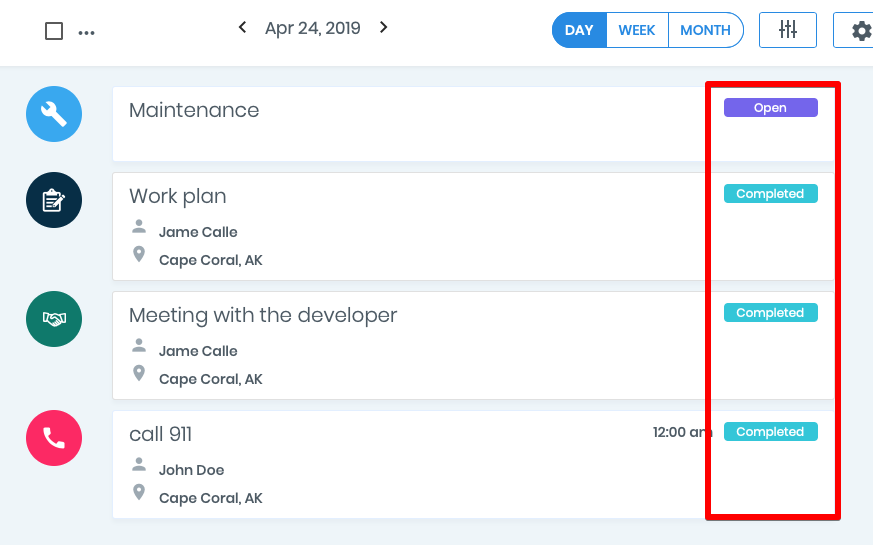
Each status of the task has its own color:
- Open - purple
- Completed - blue
- In process - orange
- Not serviced - red
In the Week and Month view, the color of the status of the task is displayed as a narrow bar on the left side of the task.
Watch this section on video: 3:12 - Types of the tasksHow to create New Task
Just click on the button New Task and in the appeared window, fill in the form with the following information:
- Name of the task
- Type of the task
- Assign the Color for the task. You can do that by clicking on the blue square next to the task type, select the color you like from the palette)
- Select the date for the task
- Set the time for the task ( not necessary field )
- Write the detailed description, if needed
This six points will be the same for all the types of the tasks. The remaining fields may vary.
Type of the task - “TYPE”
- Select a client from the drop-down list. If it is new, then create a profile via the “+” button, filling in the fields.
- Select Asset (optional)
- Select contract if there is some
- Set the location. Please note that when choosing a customer or an Asset, the location is automatically filled according to the data from the Customer or Asset profile. This field must be filled in if you want to use the Route function.
- If the task is repeated, click on the Recurrence slider and set the corresponding parameters - duration, start and end.
If you choose the type of the task-type, than the following fields should be filled in with information
- In the Involved Staff section, select the crew or employees involved in the task.
- In the next section, you can contribute goods and services that should be provided as part of this task / work. Click on Add service or item. Next, fill in the fields, as in the usual invoice.
- In Additional Info, select Field Template. Fill in the field names, adding them, as necessary, through the “+”. Write down the text or put the desired date.
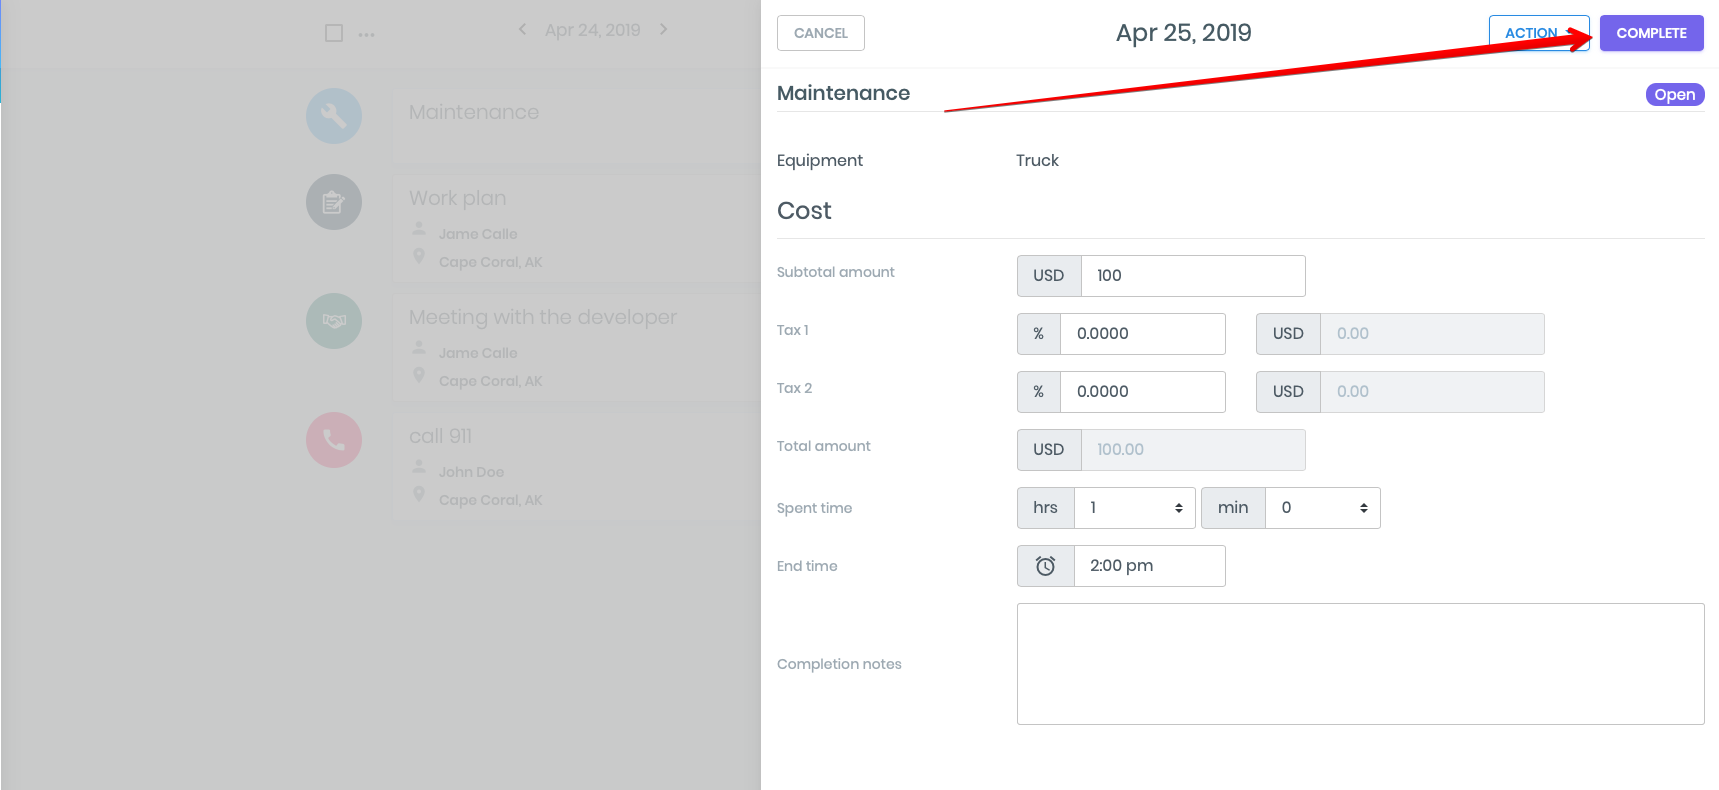
Maintenance type of task
You can create maintenance Type of task to maintenance on equipment.
The filling of the information is different only in few fields:
- Under Description, you can select the Equipment.
- In the Cost part you can add maintenance costs.
- Next will be fields for the task, such as Involved Staff and Additional Info.
Watch this section on video: 7:11 - Maintenance type of task
Start job and Complete task option
- To complete the lask, please open the task and press button “COMPLETE” in the top right corner.
- Before changing the status of the task to COMPLETE, you can add some Completion notes, if such required.
- You can also add the tife of the beginning of the task and its end.
- Please note that the fields in this subsection may differ depending on the type of task.
- In tasks such as Maintenance, Phone call, or Meeting, you need to add time spent, costs (for Maintenance), and notes.
- For the type TASK - in the Completion Details subsection you can also use the option:
- Autoinvoicing
- Sending invoice created on the basis of the task, or notifications about it (e-mail, snail mail, sms)
- Invoice auto payment
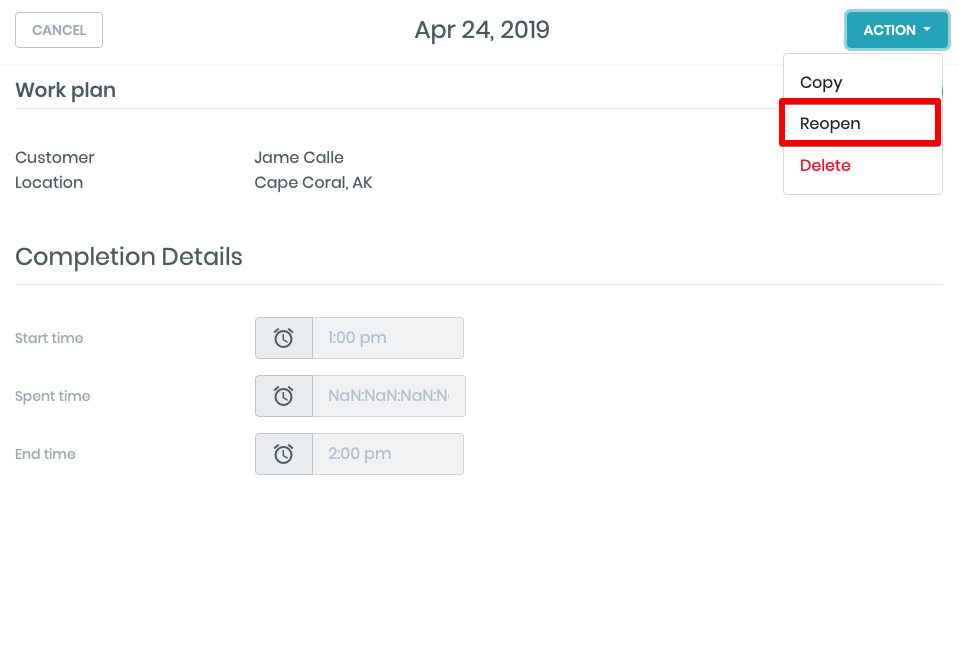
How to edit the task on status complete
To edit the task in status COMPLETED, you need first to change the status of the task to OPEN
- Open the needed task
- Click on the ACTION button
- Then click REOPEN
- Open the same task again
- Click on the Action button
- Choose Edit and implement the needed changes
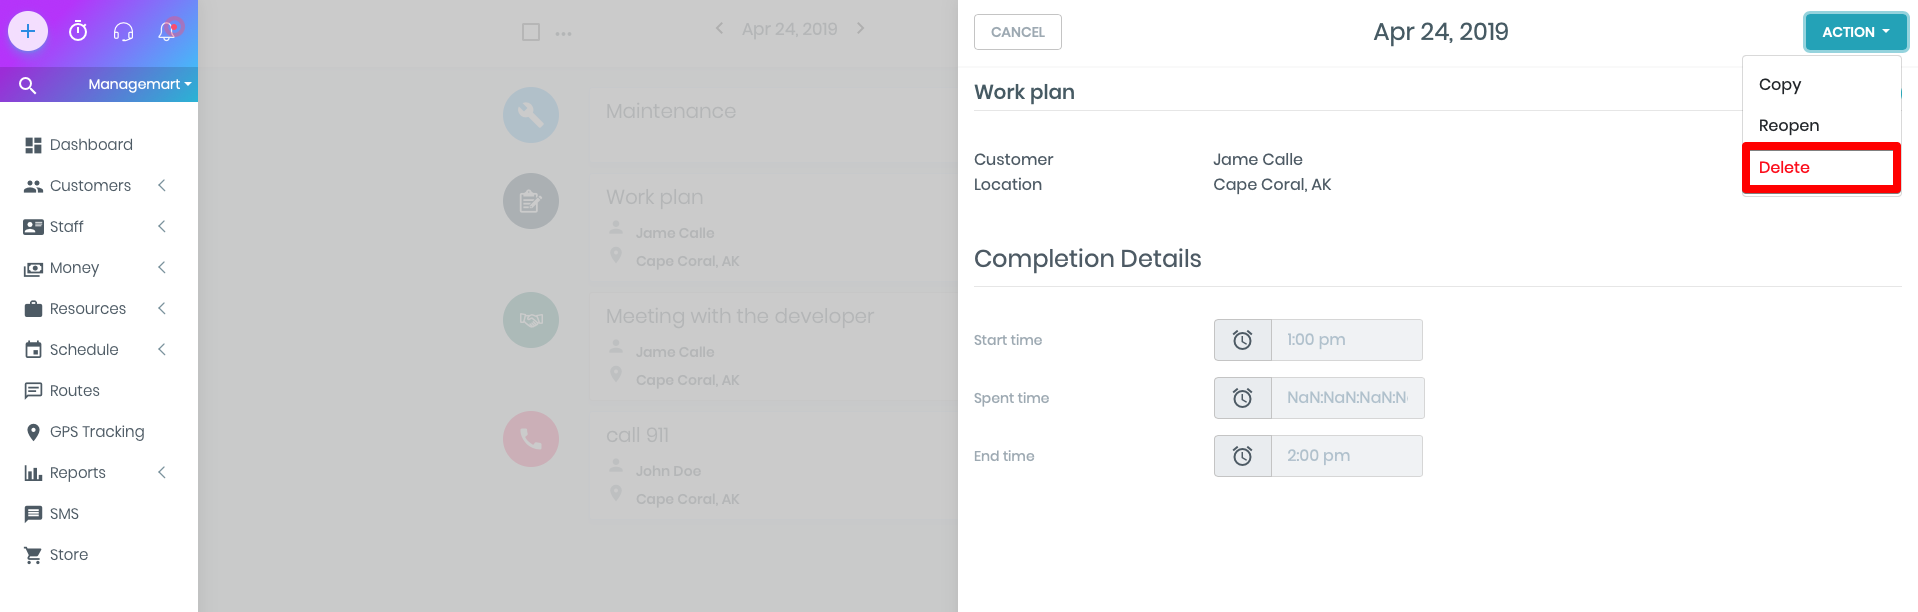
Copying and Deleting the task
While editing the task, you can also copy or delete this task by clicking - Action - Delete or Copy.
There is also another way on how to delete the needed task:
- Open the calendar in the DAY view
- Select the task by putting a tick
- Press the The ellipsis next to the selection option
- Click Delete
Moving the tasks
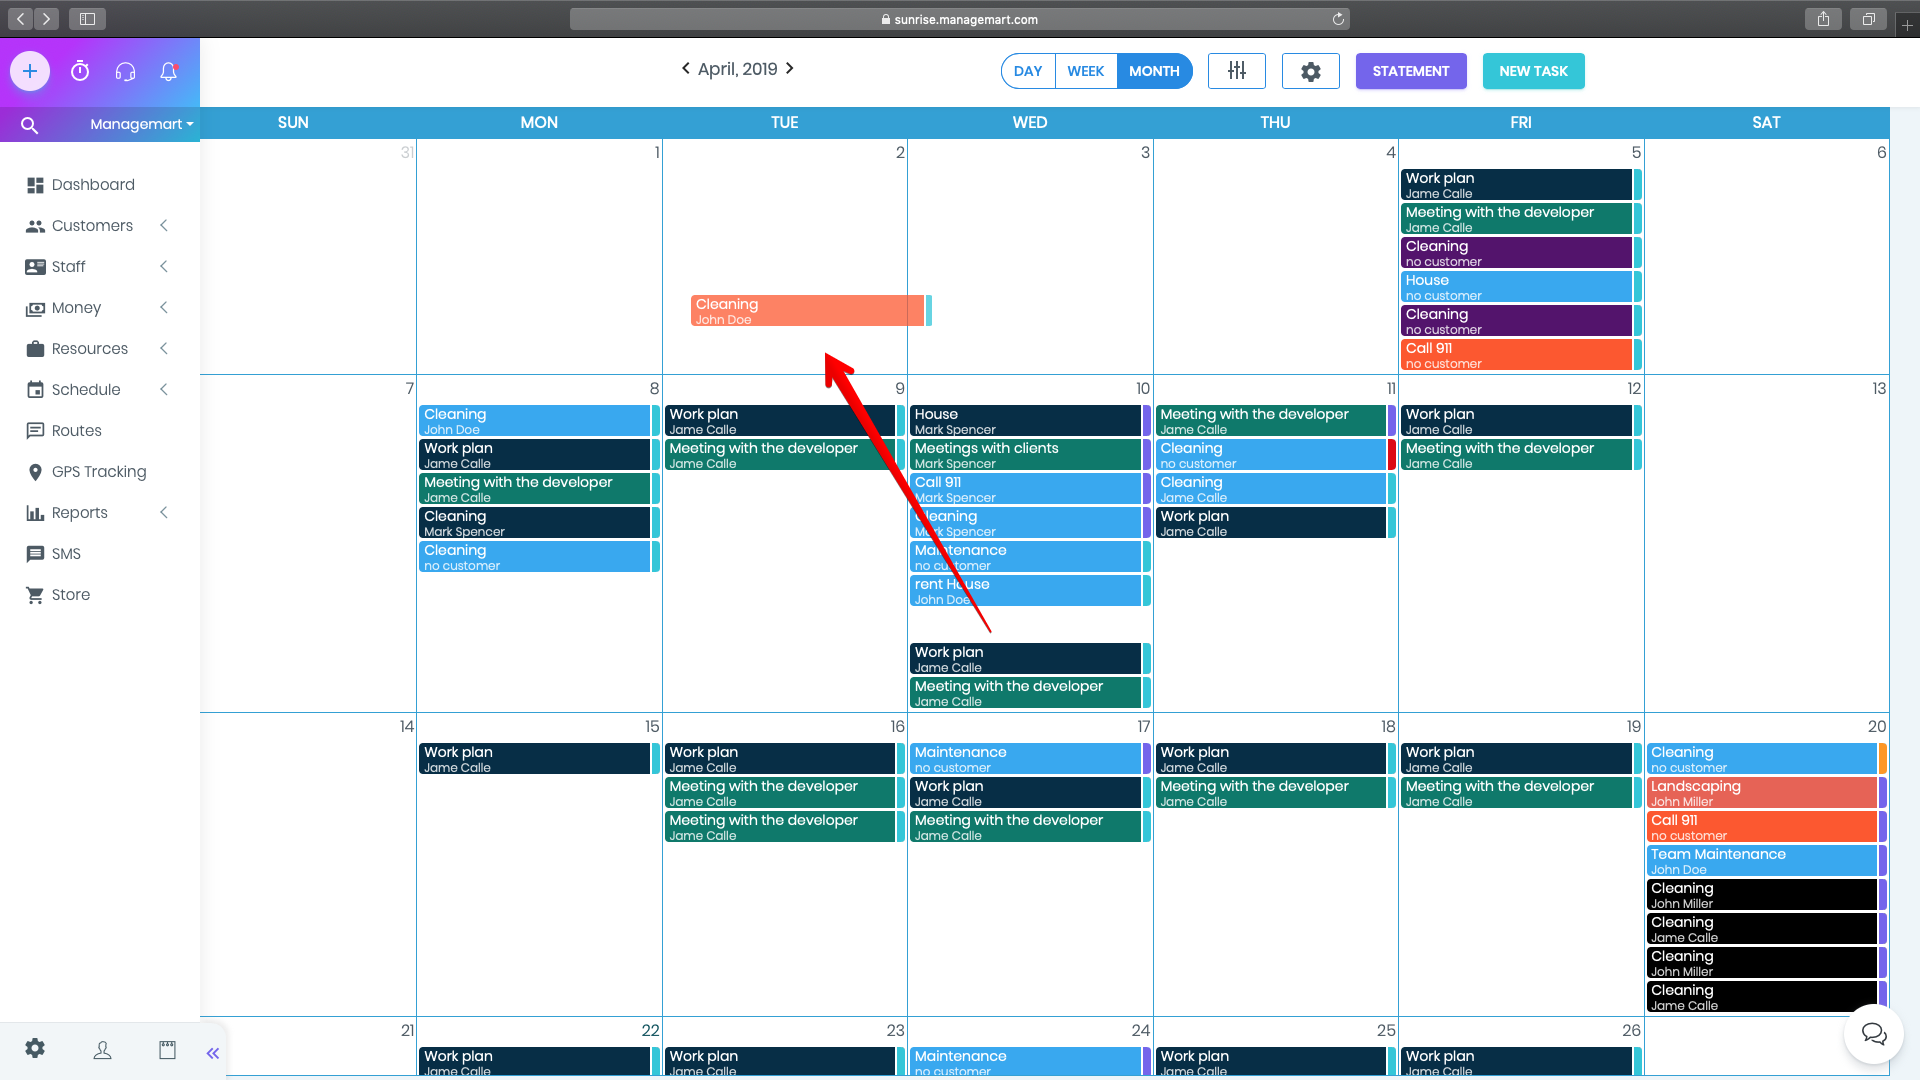
In the calendar view - MONTH, you can move any task by dragging it to another day with the left mouse button held down.
Note: If you move a task that is included in a series of repetitive tasks, the system will ask you whether to drag a specific task or the entire series?
If you select the entire series, the software will automatically recalculate the task repetition system depending on where you moved the task. If you select only one task to move, it will move and will be excluded from the series of repetitions.